Project Superspurt

Cam Timing - with thanks to Derek

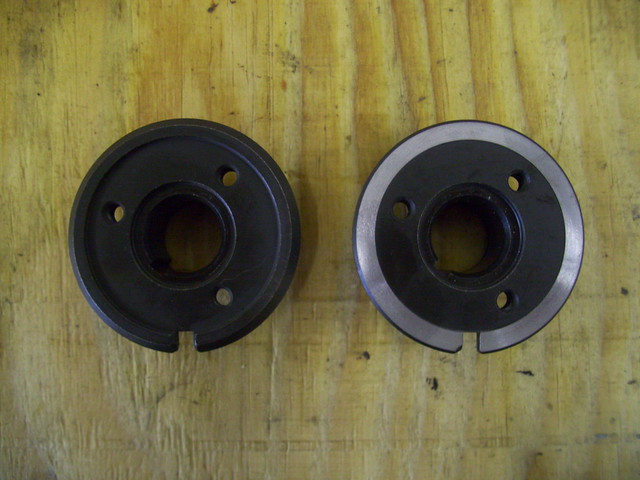
When I torqued up the adjustable pulleys, no mean feat as they don't have holes for the tool, the cams locked solid. There is a lip on the back of the pulley that was fouling - the pulleys were never meant for this bike. A few seconds in the lathe sorted it out;


Cam Timing 1 by Lindsay fae Angus, on Flickr

Here is the pulley fitted;


Cam Timing 2 by Lindsay fae Angus, on Flickr

After that it was a case of remembering what opened or closed when, what was up and what was down. Definitely worth having a helper to keep you sane and tell you when you are up the wrong drill ('dreel' :))


Cam Timing 3 by Lindsay fae Angus, on Flickr


Cam Timing 4 by Lindsay fae Angus, on Flickr


Cam Timing 5 by Lindsay fae Angus, on Flickr

Goes without saying that scabby alternator cover isn't the finished article
 
Looks and sounds complicated stuff Lindsay! What are the Wassell and Oxford guages used for?..:confused: You are a braver man than me...

How far do you think you are off completion?
 
Looks and sounds complicated stuff Lindsay!

As I have found with most tasks on these engines, doing it is not so bad as reading / thinking about it. Measure, record, make a change, measure, record, ..., ...

What are the Wassell and Oxford guages used for?..:confused:

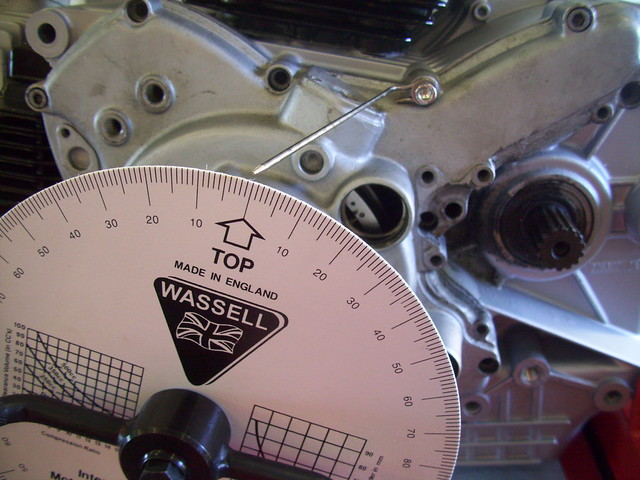
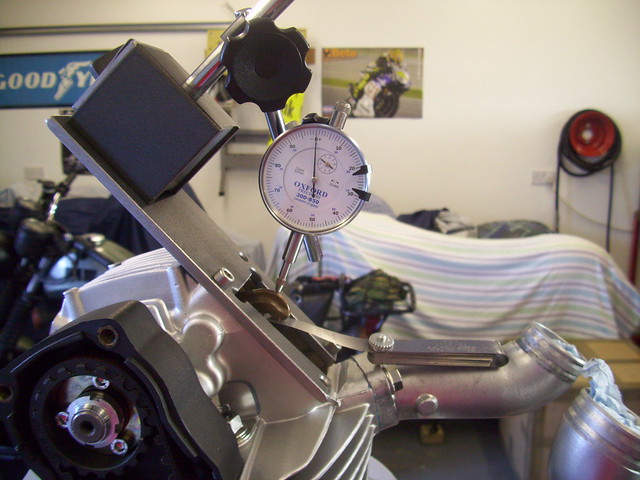
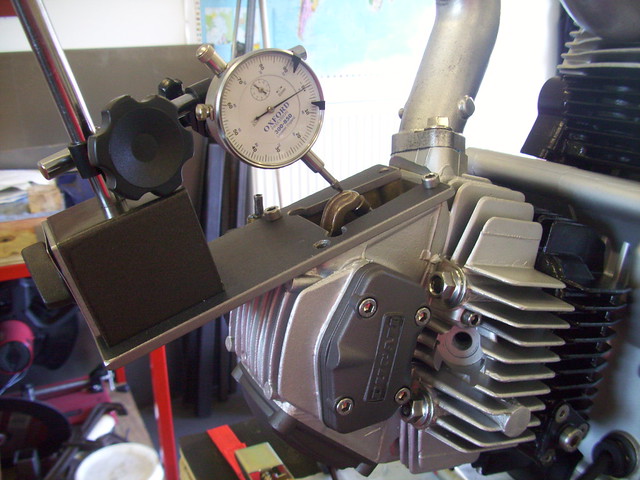
The (Wassell) degree disc is set to zero at TDC so you can tell by how many degrees rotation of the crank , relative to TDC, BDC, that the cams are opening. Cam figures are measured at 1mm lift so the (Oxford) dial gauge is measuring lift as the crank is turned. I tried to get the dial gauge in the same plane as the valve - it wasn't far off ;). One of the pictures is a bit naughty as there are no feeler gauges jammed in the opener gap. That needs to be done so that you are measuring the lift properly. The other photo shows it.

True TDC was found by (google, search) 'piston stop' method and you can see in the photo that the TDC mark on the flywheel is not quite in line with the pointer on the alternator case. Worth knowing.

You are a braver man than me...

Don't know about that. It won't build itself :D


How far do you think you are off completion?

Hard to say, have not gotten near it again for the last week, should have skipped the bike show on Saturday and gotten stuck in.. Next job will be to get the basics of the front end on and all the fun (fork vs yoke diameters, wheel spindle and spacers (1098 forks vs 996 wheels vs 900SS speedo drive....) associated with that.
 
Last edited:
Thanks for the info.....might tempt me to be braver..:rolleyes:

Sounds like you have still to have lots of fun to come...:comp2: :D
 
Tank Refurb

Tank had some Petseal in it that was flaking off, so I got some Petseal remover


Tank Refurb 1 - Petseal Remover by Lindsay fae Angus, on Flickr

This is what it had to tackle


Tank Refurb 2 by Lindsay fae Angus, on Flickr

Once the Petseal was out, looked like glassfibre resin below


Tank Refurb 3 by Lindsay fae Angus, on Flickr

A bit of paint stripper on the outside showed that there had definitely been a glass fibre repair


Tank Refurb 4 by Lindsay fae Angus, on Flickr

Another dose of stripper to get the glass fibre out and the holes started appearing


Tank Refurb 5 by Lindsay fae Angus, on Flickr


Tank Refurb 6 by Lindsay fae Angus, on Flickr


Tank Refurb 7 by Lindsay fae Angus, on Flickr

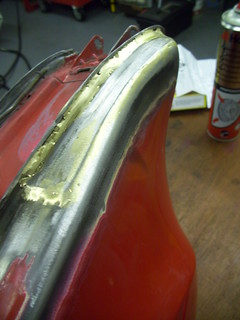
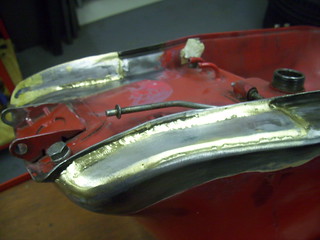
Got some patches brazed on


Tank Refurb 8 by Lindsay fae Angus, on Flickr


Tank Refurb 9 by Lindsay fae Angus, on Flickr

The flux from the brazing made a fine mess


Tank Refurb 10 by Lindsay fae Angus, on Flickr

So then I got in about the POR-15


Tank Refurb 11 by Lindsay fae Angus, on Flickr

It cleaned up the metal nicely and stabilised the rust


Tank Refurb 12 by Lindsay fae Angus, on Flickr

The instructions were very insistent that the tank had to be bone dry before applying the coating


Tank Refurb 13 by Lindsay fae Angus, on Flickr

Am very happy with the end result


Tank Refurb 14 by Lindsay fae Angus, on Flickr

The rough bits is the braze through the holes. After curing it for 6 days, I filled it with petrol and left it a few days sitting on some paper towels. No leaks. Result.
 
The glass fibre was nowt to do with me, see the Spaniard.
I've some real honking pics of that tank when I got it, holly sheeeet.
 
The glass fibre was nowt to do with me

TBH the fibreglass resin repair was pretty sound, but the Petseal definitely needed seeing to. Having gotten that far I was worried that I had weakened the resin repair while removing the Petseal and since no-one seems (still) to be able to say whether resin is ethanol resistant, a few 1mm steel plates seemed the best option :)
 
Last edited:
Remind me,what was the shock you got ?

Wilbers Type 640 - Available from David at SoloCorse who is also Nogaromill99 on the 'UK' forum and part of the MotoRapido BSB Team. You need to 'fess up to your weight, bikes weight, riding style etc and give him a wad of cash and it arrives 2 weeks later set up just for you!
 
Amazing stuff there lindsay, well not really amazing, i meant impressive, that's it.
This bike is looking real good , i hope you are keeping the kitchen windaes open, or there maybe trouble ahead

looking forward to the finished guy, :)
 
how much was the shock..? :whistle:

Just a wee bit more than entry fee + van hire + diesel + petrol + B&B + Ginsters + Red Bull for a Cadwell track day. So by not doing a track day the shock was actually almost free :D

(If I can't justify it to myself, what chance do I have of convincing SWMBO ;) )
 
Just a wee bit more than entry fee + van hire + diesel + petrol + B&B + Ginsters + Red Bull for a Cadwell track day. So by not doing a track day the shock was actually almost free :D

(If I can't justify it to myself, what chance do I have of convincing SWMBO ;) )

......absolutely no need to justify. Are you feeling guilty by chance?..;) :)
 
Bottom Yoke

Those 'Hot Rod and Custom' mags in the late 70's must have left their mark. I only went and de-seamed the bottom yoke before painting :eek:


Yoke - Bottom by Lindsay fae Angus, on Flickr

Chuffed with my nylon tipped lock stops :D (simple things / simple minds :rolleyes:)
 
progress report

Work, home maintenance (still a wee plumbing job to do :mad:) and hooning round on bikes (it was fecking SNOWING yesterday coming down from Dyce on the Triumph) have conspired that I haven't looked at the 'Spurt project for weeks....

I have ditched the plastic shims on the bottom yokes for Barr's Irn Bru / Cream Soda hybrids, the 1098 spindle fits the 996 wheel no problemo, just sorting out a speedo drive then I'll know what size spacers I need to make to keep the wheel central on the spindle.

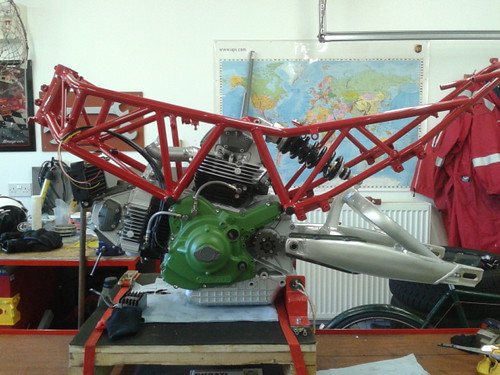
Parcel from Harry arrived yesterday so got a Sigma alloy clutch basket and Oberon slave to fit :D
 
Swingarm

Hi Lindsay what bike is the swing arm from?

That one was from an 800SS, they were also on SS1000DS and maybe some other late i.e. models. I think they were only fitted 2003, 2004 but could be wrong on that. If you find a horde of them, I would buy another one :)

Last Feb you could still get a new one at ~ £1100 :eek: Part no is 37010311A if you are insane :p
 
Last Feb you could still get a new one at ~ £1100 :eek: Part no is 37010311A if you are insane :p[/QUOTE]

I think I am insane but a skint insane!? :)
 
Back
Top Bottom