
You are using an out of date browser. It may not display this or other websites correctly.
You should upgrade or use an alternative browser.
You should upgrade or use an alternative browser.
Kawasaki KR1000 Endurance Replica
- Thread starter Exige
- Start date


The bobbins still look like cheap Chinese blingA mate called round tonight so I took the opportunity to lift it on to its legs!!!
View attachment 53050
View attachment 53051
View attachment 53052
View attachment 53053

Not from here they don't, they look lushThe bobbins still look like cheap Chinese bling
 they would clash on a pink Monster though
You’ll be buying purple bolts nextNot from here they don't, they look lush

Now they would go well with a pink monsterYou’ll be buying purple bolts next

Looking very impressive, even though there's still a lot to bolt on !!

Well it is the 3rd and final assembly
 sump and oil filter went on tonight...
Oh and this lil beauty has just gone on in the last half hour too which was the main reason for getting the sump on today
Didn't need to go on yet but I couldn't wait and it's not in the way of the rest of the build so feck it, it's on at last
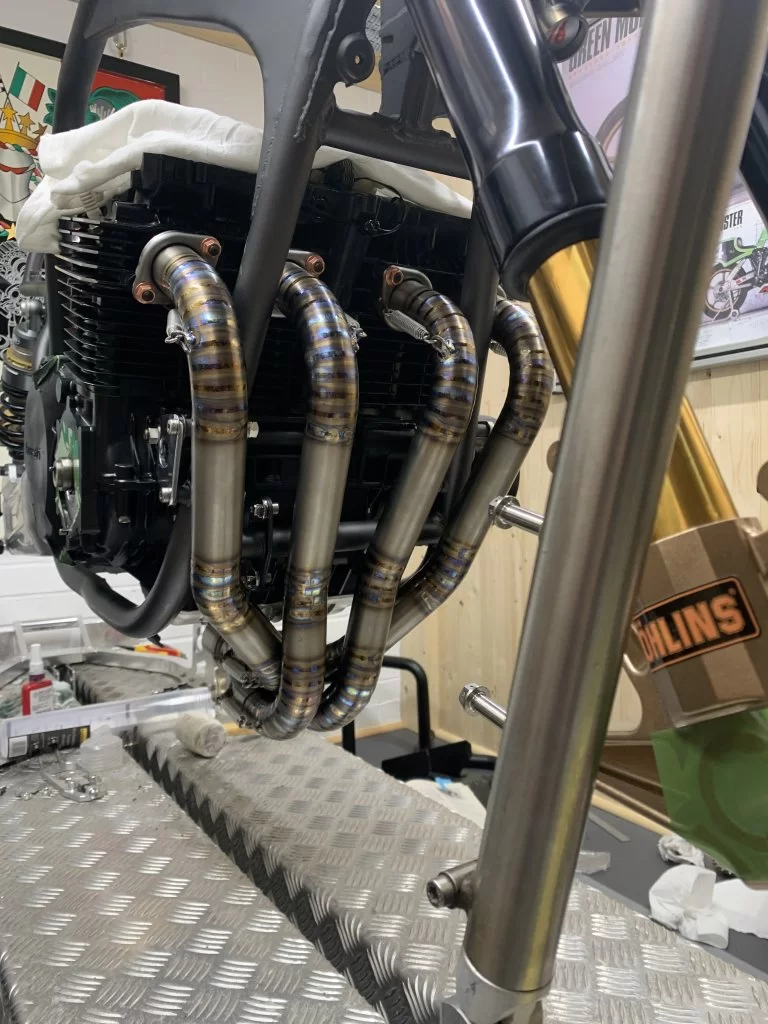
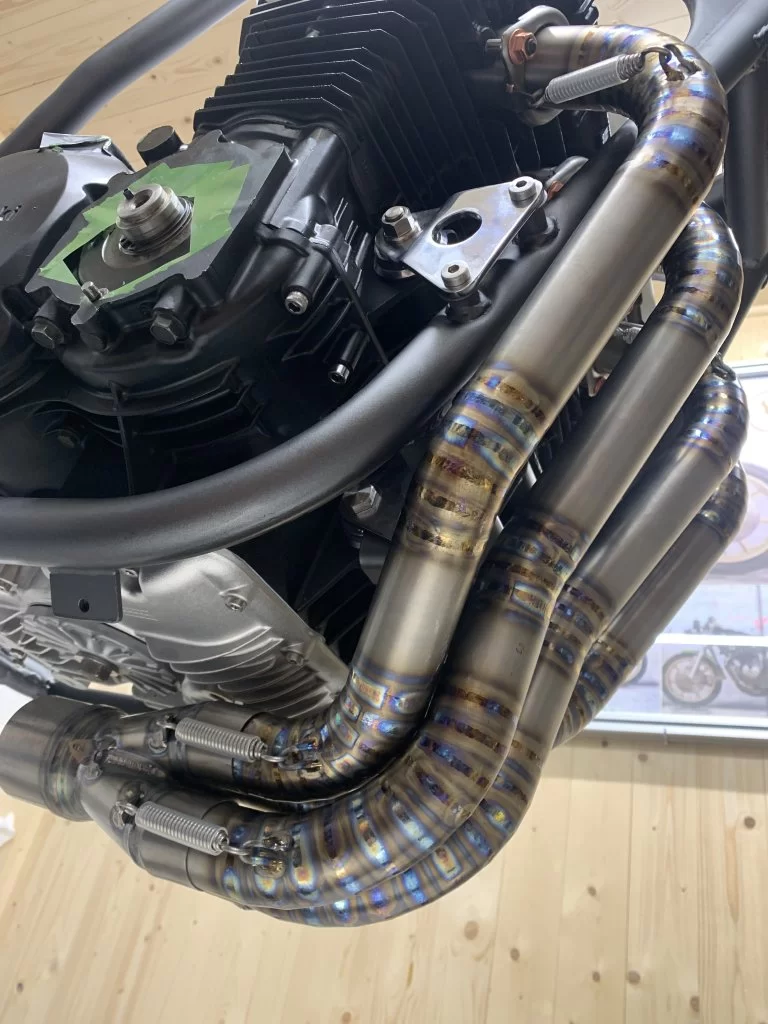
Didn't need to go on yet but I couldn't wait and it's not in the way of the rest of the build so feck it, it's on at last

Now we see why this is taking so long.
This thread is really all about drinking in the garage with the occasional bike tinkering.

Blackadder
Well-known member
Ex, I am really enjoying this thread,the skills are mind blowing, you are a gifted Engineer sir ! You take your time, if a jobs worth doing and all that,

And what's wrong with thatNow we see why this is taking so long.
This thread is really all about drinking in the garage with the occasional bike tinkering.

Yes, it was conceded due to the fit of the belly pan which was very tight on clearance but now it's on it looks like it might drop out just - but I didn't try as the drain plug access is compromised anyway. Only takes 5 mins to take the belly pan and exhaust up to the headers off to drop the oil and filterThat is a mean looking collector! Prob just a perspective thing from the camera angle but it looks like it needs coming off to change out the oil filter?

I've not done much hands on 'engineering' since college tbh other than Jaguar Land Rover prototype builds which isn't as taxing - I've mainly worked in Engineering / Technical Management so it's a refreshing change to try and put my hand to something new, the frame and tank being the main challenges for me - just learning as I go. Credit goes to Chad for the exhaust and frame welding as I wasn't about to spend 10 years getting to an acceptable standard as that would have lengthened the build a little!Ex, I am really enjoying this thread,the skills are mind blowing, you are a gifted Engineer sir ! You take your time, if a jobs worth doing and all that,

Noticed the E Clips were a bit loose on the Chain Adjusters and when checking for new ones I noticed on Ebay people were listing 6mm & 1/4" as the same size so I'm guessing mine were 1/4" which is actually 6.35mm. So hunted some metric stainless ones down which dropped through the letter box this morning - all is well now.

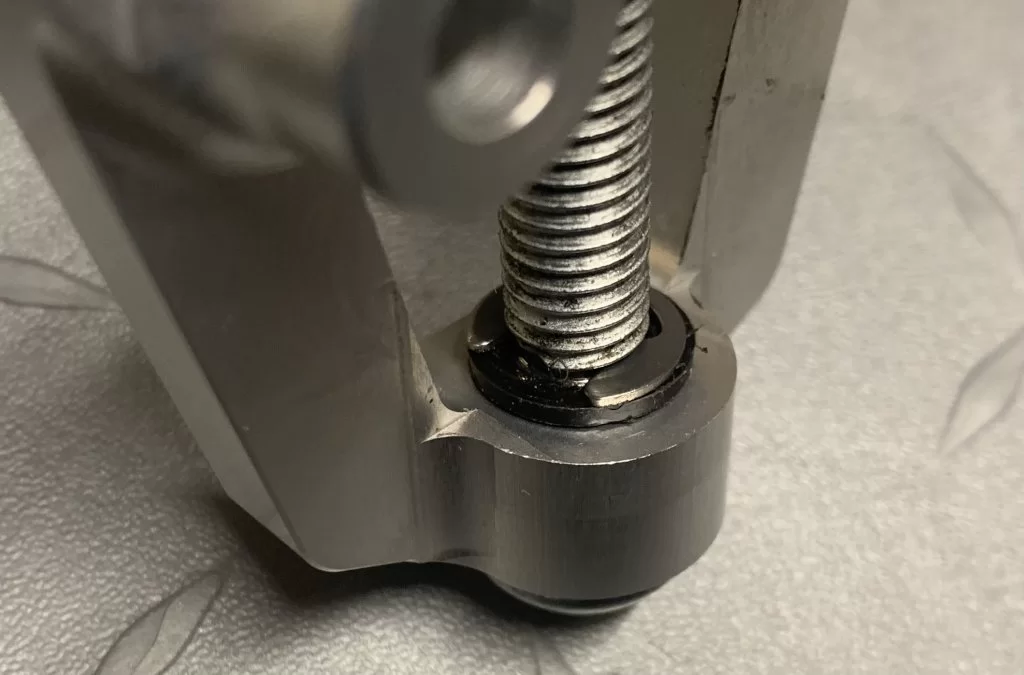
Now all thread locked and torqued in place with the rear hangers too...
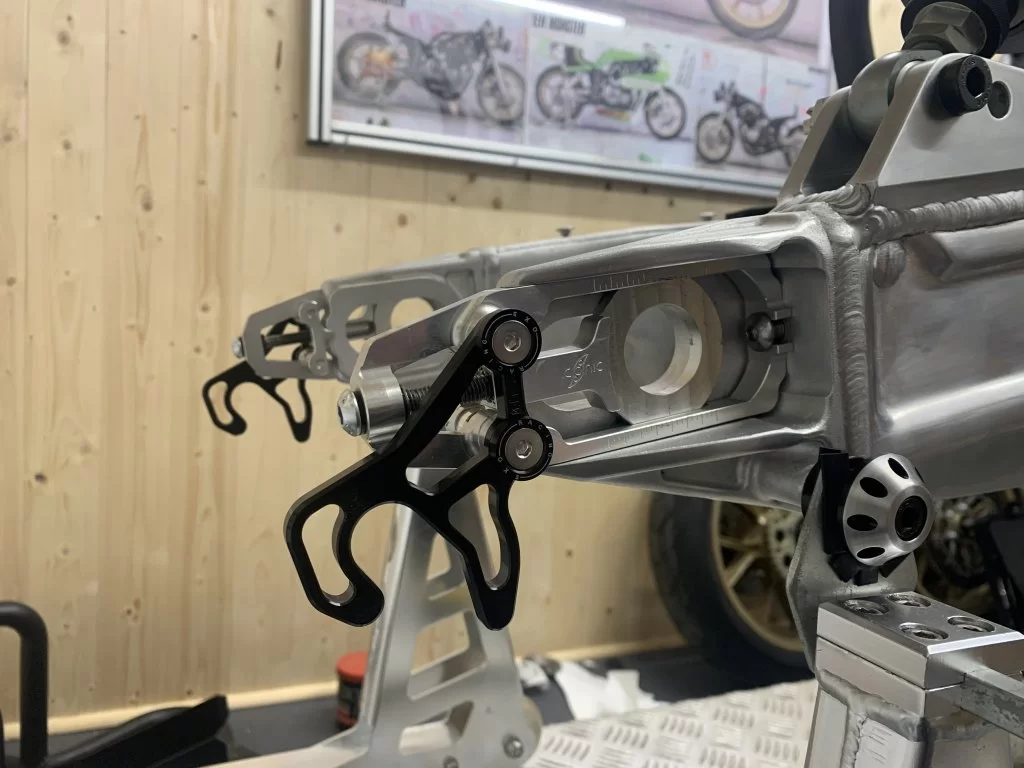
Now all thread locked and torqued in place with the rear hangers too...
Spent a lot of wonga on disc bolts and sprocket nuts as well as tyres today 
Was just checking my starter clutch mechanism as it needs transferring to the new flywheel (which is diddy)

And checked the roller mechanisms…
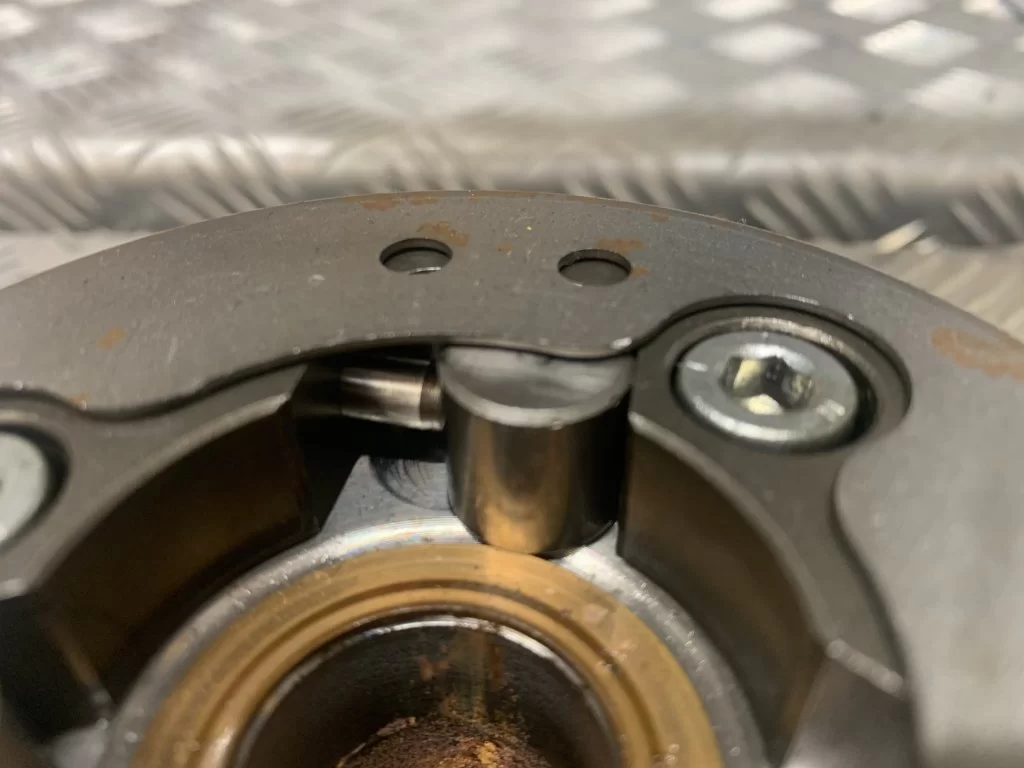
And noticed there was a spring and pin missing but the roller was still in place so it must have been assembled like this when built at NCK Racing in the 90’s
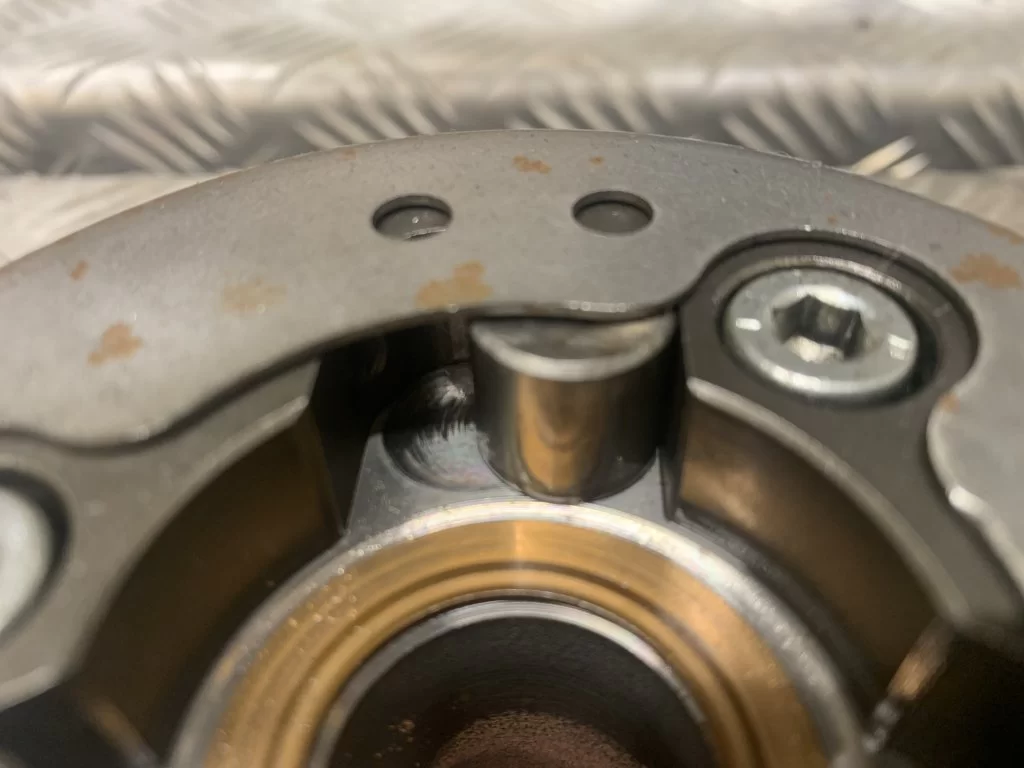
Ordered a full (made in Japan) starter clutch repair kit for £30 just now.
Was just checking my starter clutch mechanism as it needs transferring to the new flywheel (which is diddy)
And checked the roller mechanisms…
And noticed there was a spring and pin missing but the roller was still in place
so it must have been assembled like this when built at NCK Racing in the 90’s Ordered a full (made in Japan) starter clutch repair kit for £30 just now.
Although I am currently on sabbatical from the build due to family activity for the past week and next month all my parts have arrived for the wheel fitment, so I got the sump plug in, swapped the two outer headers spring clamps round so the springs sat correctly and fitted my Ti bolts and sprocket nuts in readiness for the new tyres to be fitted. The sprocket nuts were 1mm too large on the flange dia so wouldn't fit the recess on the sprocket, so I bolted them to a bit of M10 threaded bar, dropped it in the drill and span each of them against the grinding wheel until they were just right, finishing with a spin against some wet and dry to polish the edge (that you don't see)...
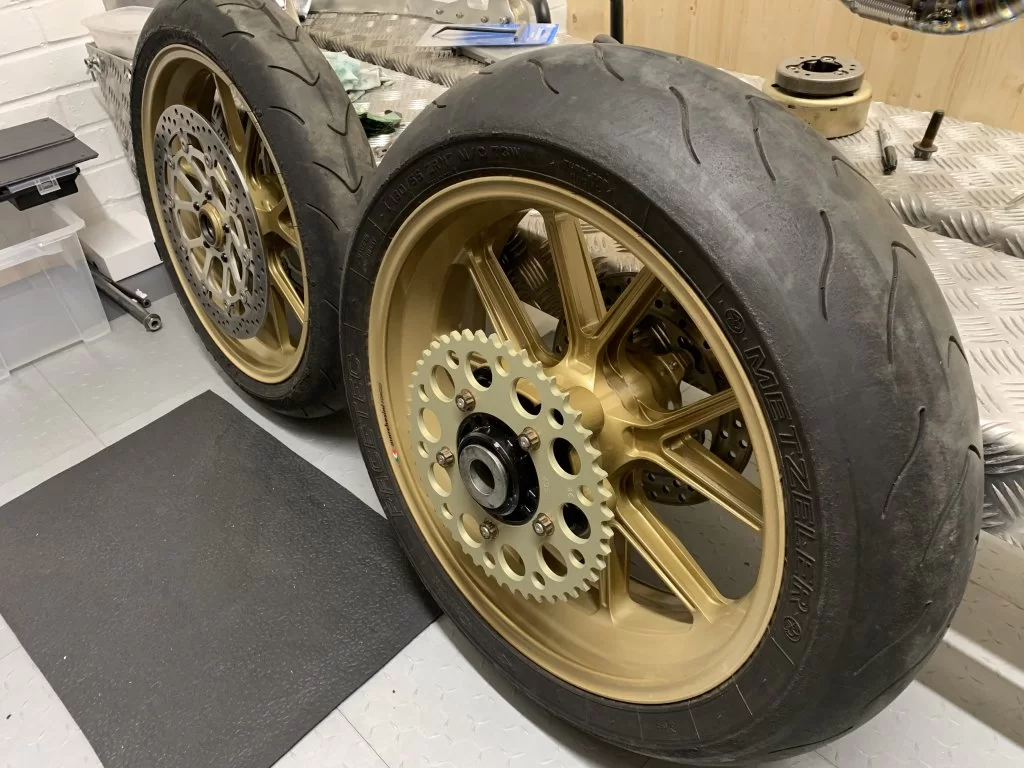
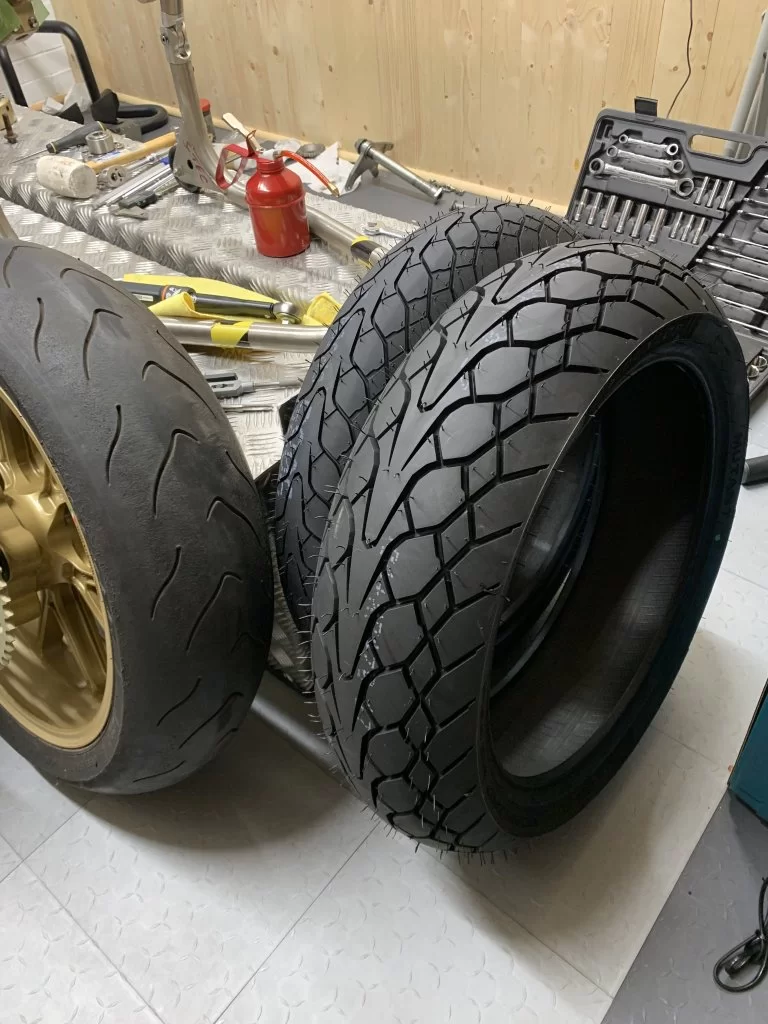

Although I am currently on sabbatical from the build due to family activity for the past week and next month all my parts have arrived for the wheel fitment, so I got the sump plug in
Won't fitting the sumplug on the wheels throw out the balancing
Tonight I sneaked in the garage and re fitted the exhaust collector and the rear of the exhaust too
View attachment 54495
Serious question. Visually, that looks like you would have to remove the exhaust to do an oil change, or is it just the camera angle ?
Your first question makes no sense at allWon't fitting the sumplug on the wheels throw out the balancing
Serious question. Visually, that looks like you would have to remove the exhaust to do an oil change, or is it just the camera angle ?
, your second has already been covered only 7 post previous to yours 
It is a much quicker job than many modern bikes with a fairing to drain the oil and change the filter... belly pan off in 2 or 3 mins max, rear section of the exhaust off in 2 minutes.

Tyres on the wheels first my boy - everything has an orderCome on Exi, you can't not put the wheels on now !!
Sneak out again !

What tyres are those? Pic 2. They look like some sort of 70/30 adv bike tire
Although I am currently on sabbatical from the build due to family activity for the past week and next month all my parts have arrived for the wheel fitment, so I got the sump plug in, swapped the two outer headers spring clamps round so the springs sat correctly and fitted my Ti bolts and sprocket nuts in readiness for the new tyres to be fitted. The sprocket nuts were 1mm too large on the flange dia so wouldn't fit the recess on the sprocket, so I bolted them to a bit of M10 threaded bar, dropped it in the drill and span each of them against the grinding wheel until they were just right, finishing with a spin against some wet and dry to polish the edge (that you don't see)...
View attachment 54491
View attachment 54492
Good grip on kitchen LinoWhat tyres are those? Pic 2. They look like some sort of 70/30 adv bike tire
What tyres are those? Pic 2. They look like some sort of 70/30 adv bike tire
They are an all round tyre designed for sports bikes and were purposefully designed to look like retro rain tyres which suited the bike better than modern racy type tyres. Bloody expensive though
 probably the best tyre for your V4 Multi
Last edited:
You have caught Newbi-ituss and you may need to get out on a bike moreGood grip on kitchen Lino
it would do your frustrations no end of good
It’s too hot I’m scared to go outYou have caught Newbi-ituss and you may need to get out on a bike more