
You are using an out of date browser. It may not display this or other websites correctly.
You should upgrade or use an alternative browser.
You should upgrade or use an alternative browser.
Métis 2 Bobber Build
- Thread starter CAT3
- Start date
 what did you design? Nothing

From what Rob says you should count your blessings…..For example, I've never met Exige,

Very Apt for you Queenie boy, very well done

Have you seen RobFrom what Rob says you should count your blessings…..


Attachments


I've re-configured the oil pump connections this morning. The two main fittings on the top of the pump body were a bit of a pain to get out, (the two next to each other with the black caps on. You have to remove the hose tail, which is easy, then remove the body) requiring a bit of heat to soften the thread sealant S&S had used. They are awkward to get a 1/2" open-ended spanner on too because of their shape, you can only get the spanner on the fitting-body in two positions, 180 degrees apart & space is restricted by the other fitting & the crankcase. Anyway, they're all out or loose now, just waiting for the new tube of sealant to arrive before I fit them finally.
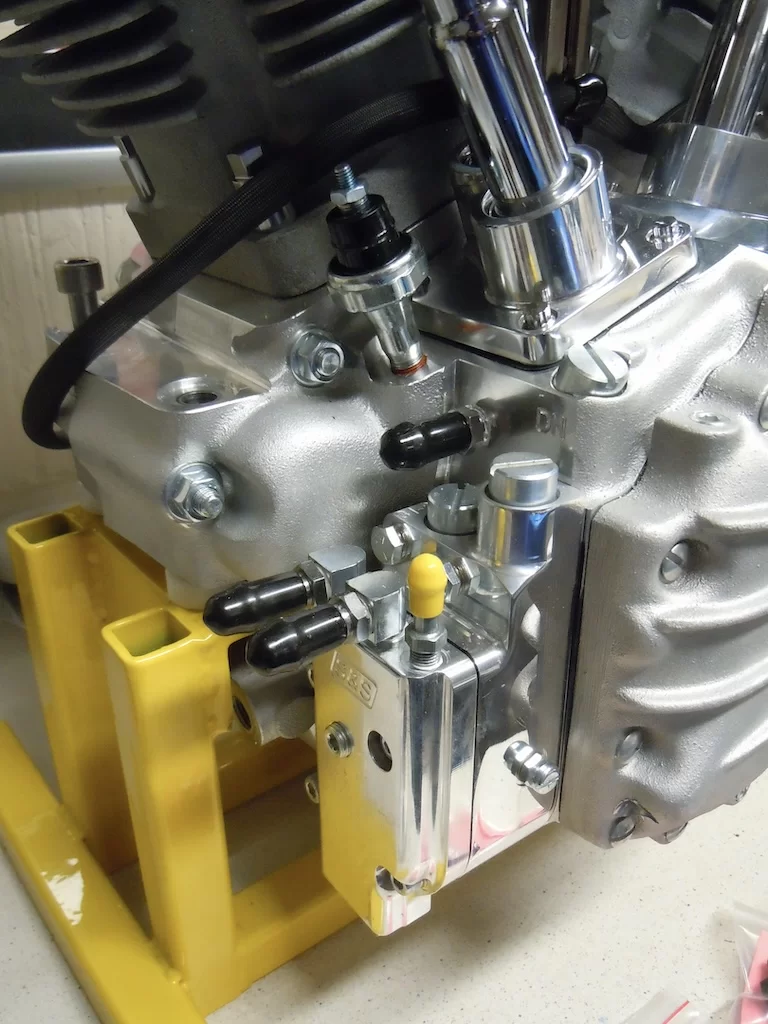
The oil pressure switch will be re-located to allow the oil pressure gauge to be fitted in such a position that it can be seen when riding the bike.
The fitting just below the gauge is for the crankcase breather, which goes to the oil tank & vents in it.
The hose tail with the yellow cap on, (above picture) is also removed & blanked off. That's for the chain oiler if needed, I don't want that.
The 90 degree fitting that was nearest the crankcase in the picture above is for the oil line that goes to the oil filter. Because my oil filter is mounted to the bottom of the frame downtube I'll use the lower port as it gives the best hose route & that top port will be blanked off too.
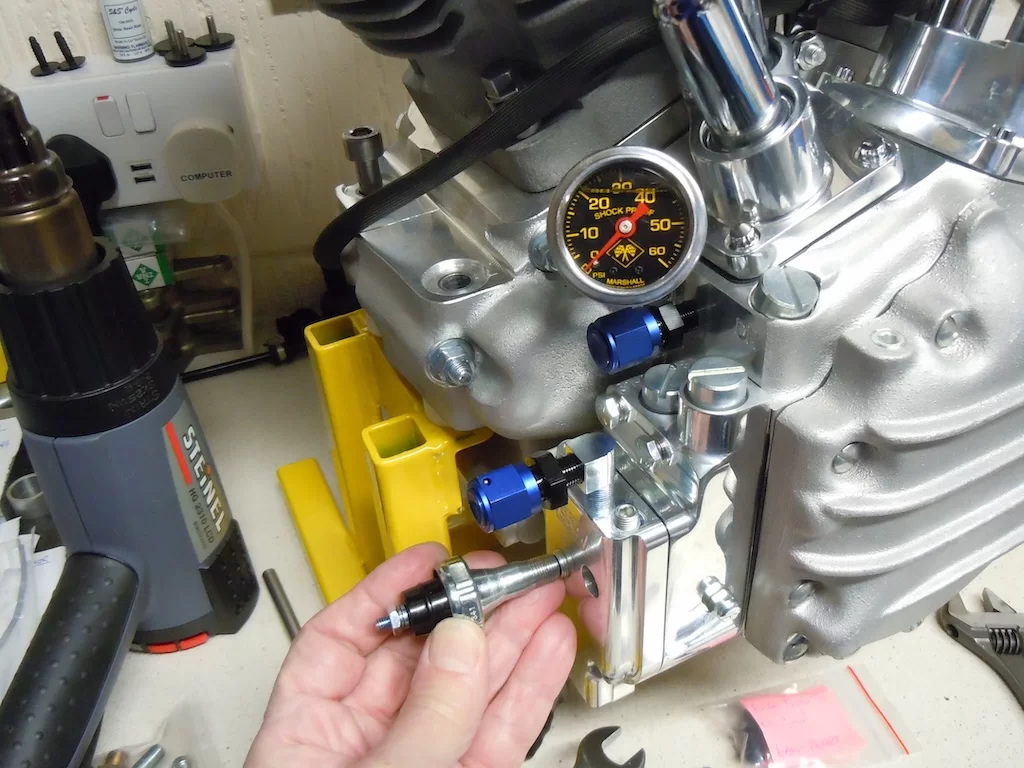
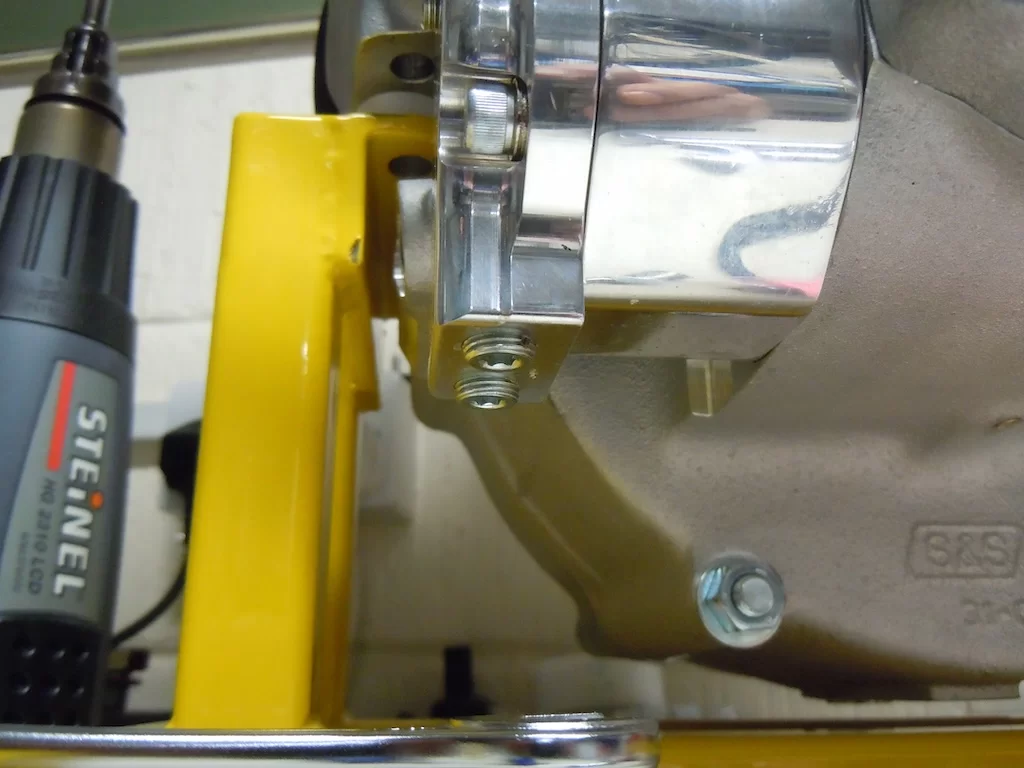
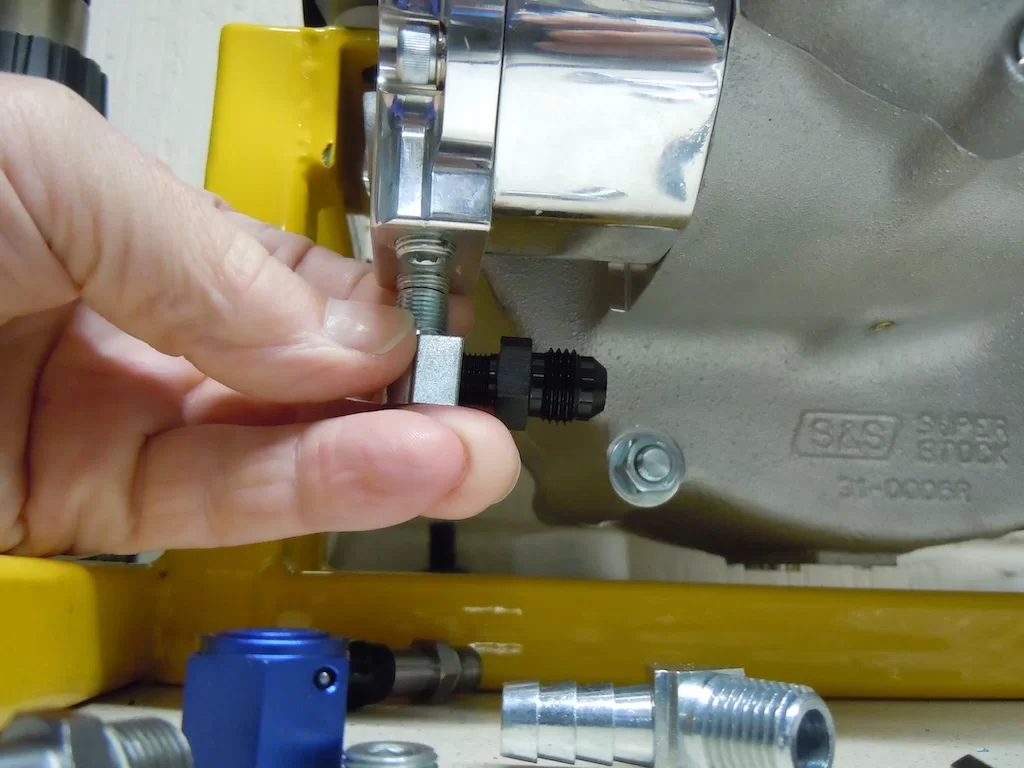
The two lower ports in the oil pump body are optional oil supply & filter supply line ports, you just use whichever ports suit your hose routes best. I'll be just using the furthest away port in the picture below.
Please be aware this build thread is also posted on some other World Wide Web site forums, so the Ducati Community members will NOT be the only people reading about my exploits. Just to save any confusion regarding exclusivity
The oil pressure switch will be re-located to allow the oil pressure gauge to be fitted in such a position that it can be seen when riding the bike.
The fitting just below the gauge is for the crankcase breather, which goes to the oil tank & vents in it.
The hose tail with the yellow cap on, (above picture) is also removed & blanked off. That's for the chain oiler if needed, I don't want that.
The 90 degree fitting that was nearest the crankcase in the picture above is for the oil line that goes to the oil filter. Because my oil filter is mounted to the bottom of the frame downtube I'll use the lower port as it gives the best hose route & that top port will be blanked off too.
The two lower ports in the oil pump body are optional oil supply & filter supply line ports, you just use whichever ports suit your hose routes best. I'll be just using the furthest away port in the picture below.
Please be aware this build thread is also posted on some other World Wide Web site forums, so the Ducati Community members will NOT be the only people reading about my exploits. Just to save any confusion regarding exclusivity

Wait wait wait.I've re-configured the oil pump connections this morning. The two main fittings on the top of the pump body were a bit of a pain to get out, (the two next to each other with the black caps on. You have to remove the hose tail, which is easy, then remove the body) requiring a bit of heat to soften the thread sealant S&S had used. They are awkward to get a 1/2" open-ended spanner on too because of their shape, you can only get the spanner on the fitting-body in two positions, 180 degrees apart & space is restricted by the other fitting & the crankcase. Anyway, they're all out or loose now, just waiting for the new tube of sealant to arrive before I fit them finally.
View attachment 92582
The oil pressure switch will be re-located to allow the oil pressure gauge to be fitted in such a position that it can be seen when riding the bike.
The fitting just below the gauge is for the crankcase breather, which goes to the oil tank & vents in it.
The hose tail with the yellow cap on, (above picture) is also removed & blanked off. That's for the chain oiler if needed, I don't want that.
The 90 degree fitting that was nearest the crankcase in the picture above is for the oil line that goes to the oil filter. Because my oil filter is mounted to the bottom of the frame downtube I'll use the lower port as it gives the best hose route & that top port will be blanked off too.
View attachment 92583
The two lower ports in the oil pump body are optional oil supply & filter supply line ports, you just use whichever ports suit your hose routes best. I'll be just using the furthest away port in the picture below.
View attachment 92587
View attachment 92588
Please be aware this build thread is also posted on some other World Wide Web site forums, so the Ducati Community members will NOT be the only people reading about my exploits. Just to save any confusion regarding exclusivity
*Not* exclusive? OMG
I thought for a moment he was a bit of a rebel, but he's mentioned possibly fitting a chain oiler so deffo notWait wait wait.
*Not* exclusive? OMG
in fact the total opposite 
I don't want oil spraying everywhere, so there'll be no chain oiler !!I thought for a moment he was a bit of a rebel, but he's mentioned possibly fitting a chain oiler so deffo not

You haven't thought of asking Exige how his chain-oiler works on his kwak build?I don't want oil spraying everywhere, so there'll be no chain oiler !!
I believe he mounts the oiler on the frame but doesn't put oil in it. Problem solved!
I don't want oil spraying everywhere, so there'll be no chain oiler !!
You haven't thought of asking Exige how his chain-oiler works on his kwak build?
I believe he mounts the oiler on the frame but doesn't put oil in it. Problem solved!
You're not of this world

That, Sir, is the best news I've had in the past few years.You're not of this world

You post it first here don't youI've re-configured the oil pump connections this morning. The two main fittings on the top of the pump body were a bit of a pain to get out, (the two next to each other with the black caps on. You have to remove the hose tail, which is easy, then remove the body) requiring a bit of heat to soften the thread sealant S&S had used. They are awkward to get a 1/2" open-ended spanner on too because of their shape, you can only get the spanner on the fitting-body in two positions, 180 degrees apart & space is restricted by the other fitting & the crankcase. Anyway, they're all out or loose now, just waiting for the new tube of sealant to arrive before I fit them finally.
View attachment 92582
The oil pressure switch will be re-located to allow the oil pressure gauge to be fitted in such a position that it can be seen when riding the bike.
The fitting just below the gauge is for the crankcase breather, which goes to the oil tank & vents in it.
The hose tail with the yellow cap on, (above picture) is also removed & blanked off. That's for the chain oiler if needed, I don't want that.
The 90 degree fitting that was nearest the crankcase in the picture above is for the oil line that goes to the oil filter. Because my oil filter is mounted to the bottom of the frame downtube I'll use the lower port as it gives the best hose route & that top port will be blanked off too.
View attachment 92583
The two lower ports in the oil pump body are optional oil supply & filter supply line ports, you just use whichever ports suit your hose routes best. I'll be just using the furthest away port in the picture below.
View attachment 92587
View attachment 92588
Please be aware this build thread is also posted on some other World Wide Web site forums, so the Ducati Community members will NOT be the only people reading about my exploits. Just to save any confusion regarding exclusivity

He better doYou post it first here don't you

Not always, I like not to show any favourites !You post it first here don't you

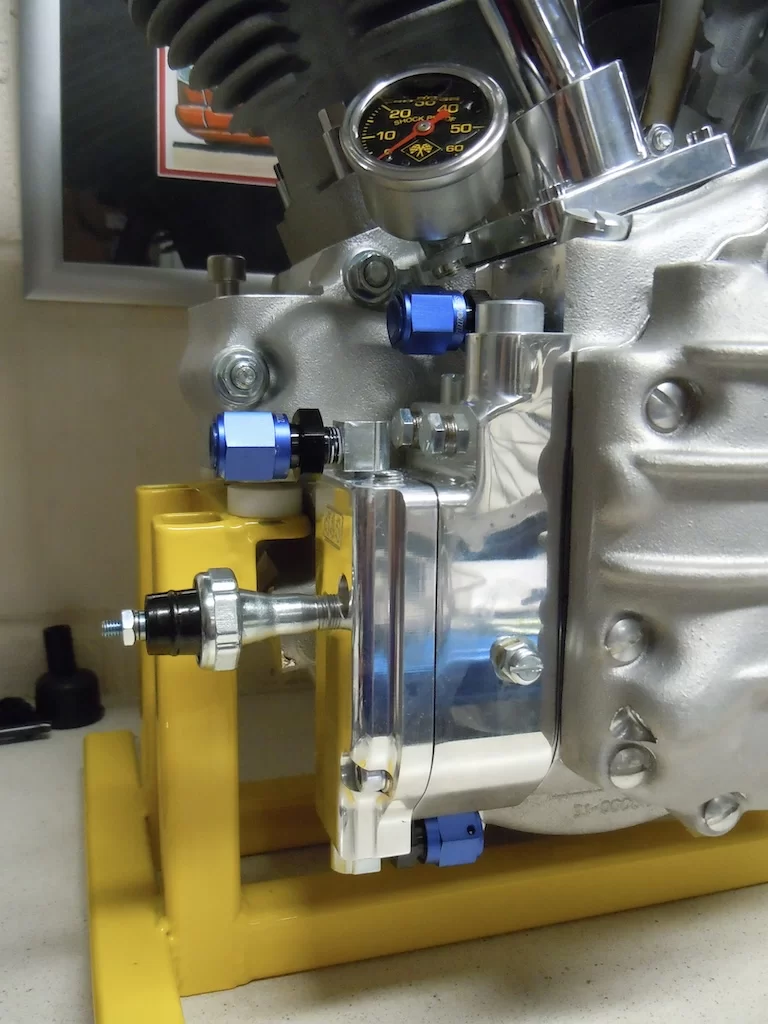
More progress today, got the oil line fittings, blanks, oil pressure gauge & oil pressure switch installed in the oil pump.
Then, removed the ugly carb support bracket as it gets in the way of where I want to route the fuel pipe, (between the two cylinder barrels).
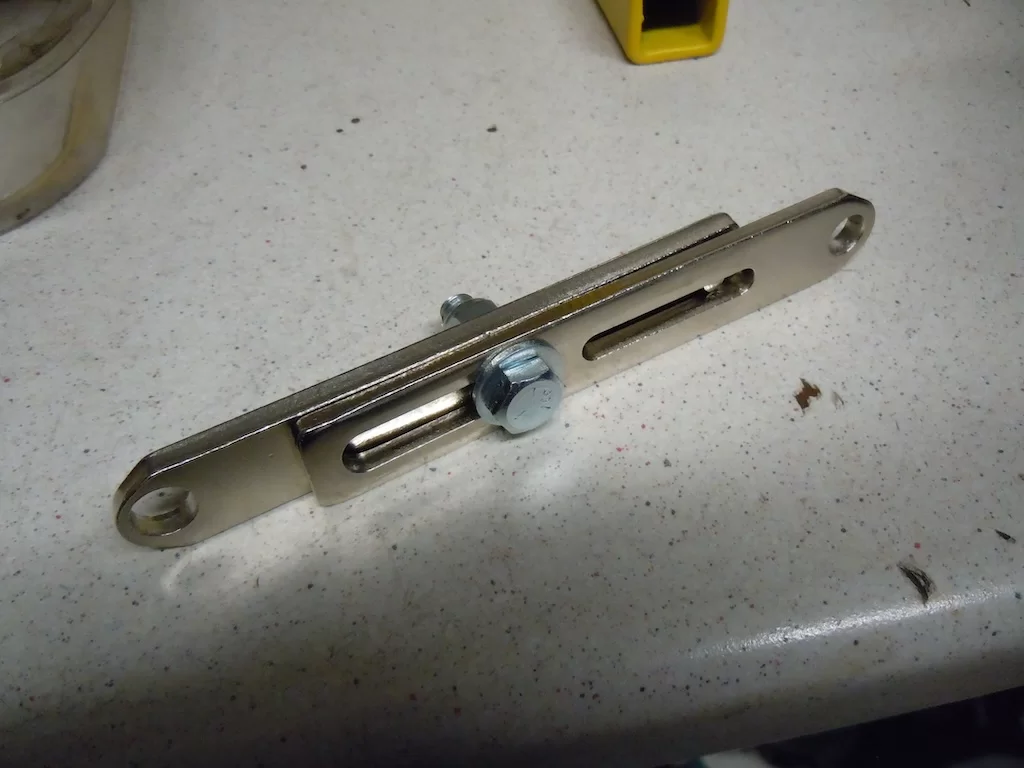
And made a new bracket with a slight curve in it to allow a bit more clearance for the fuel pipe. Had to make a small 4mm stainless steel spacer too as the two mounting points for the support are slightly off-set.
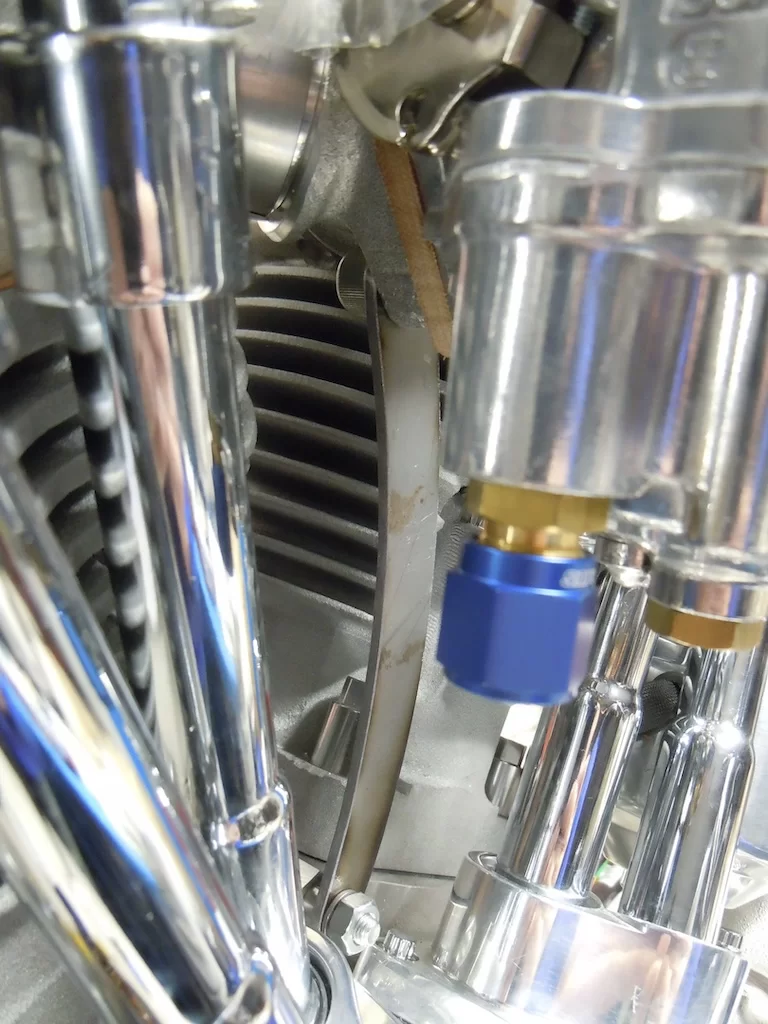
Then made a couple of posts for the top engine mount. I cut the curved tube down to fit between the two posts & then weld it in place. The final two parts will have to wait until the engine is fitted in the frame & aligned. Once finished it should look much the same as the one I made for the first bike.
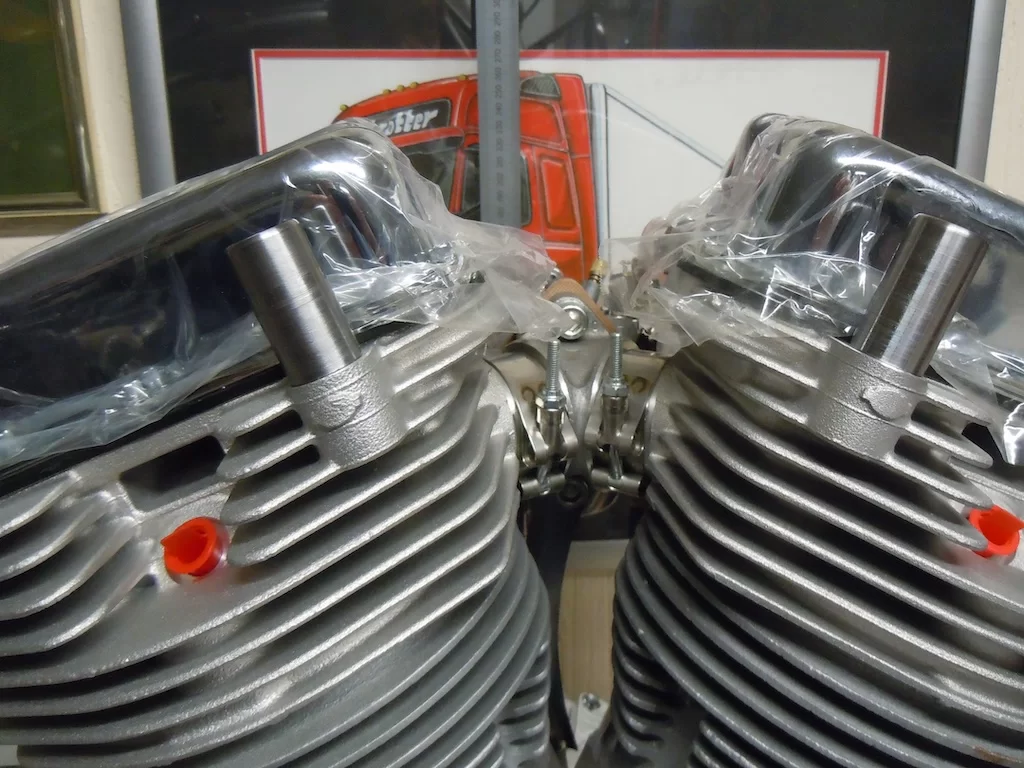
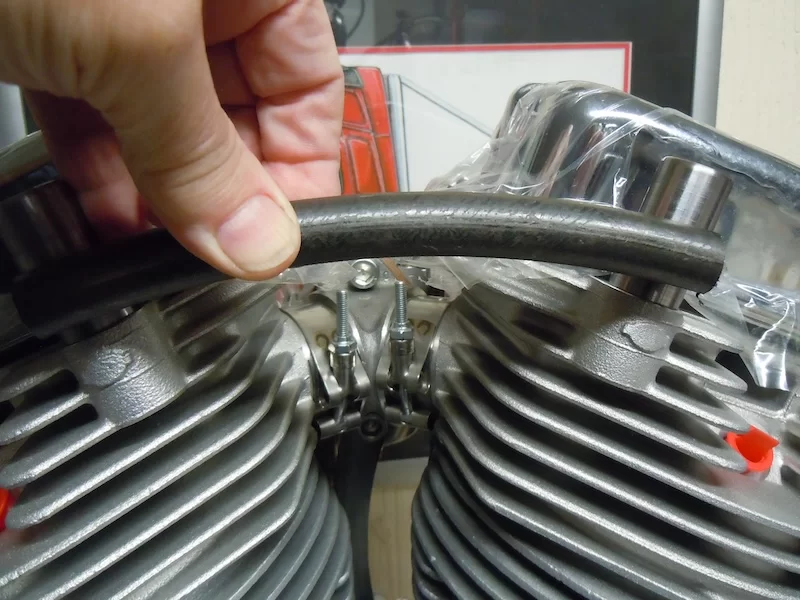
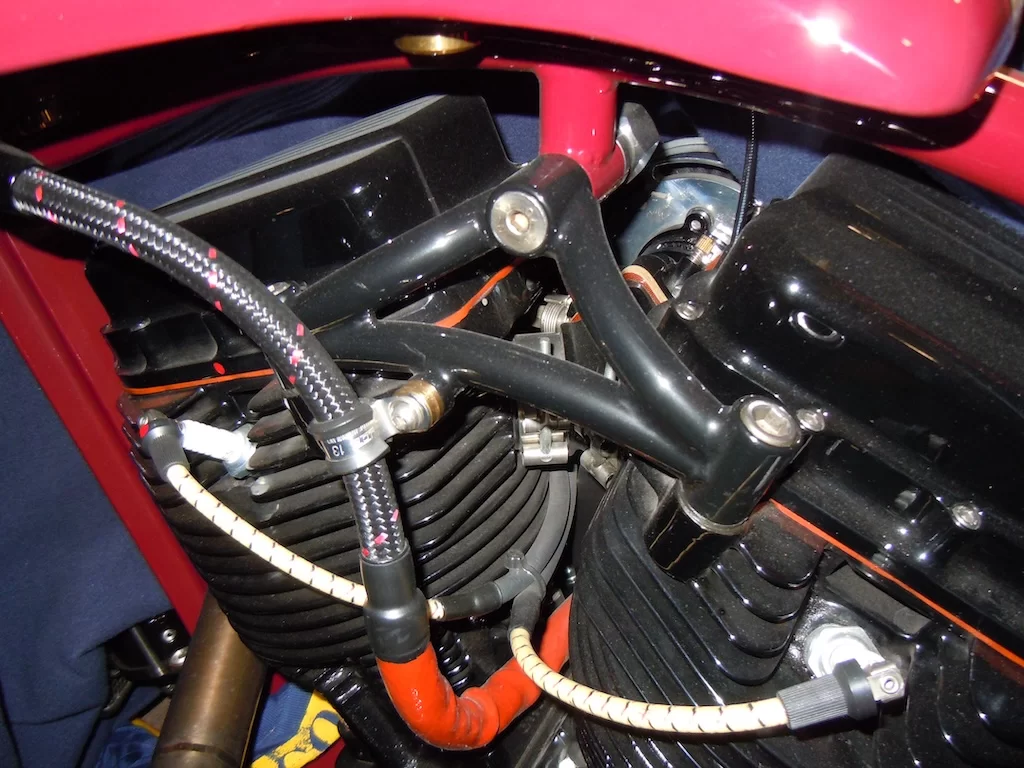
Then, removed the ugly carb support bracket as it gets in the way of where I want to route the fuel pipe, (between the two cylinder barrels).
And made a new bracket with a slight curve in it to allow a bit more clearance for the fuel pipe. Had to make a small 4mm stainless steel spacer too as the two mounting points for the support are slightly off-set.
Then made a couple of posts for the top engine mount. I cut the curved tube down to fit between the two posts & then weld it in place. The final two parts will have to wait until the engine is fitted in the frame & aligned. Once finished it should look much the same as the one I made for the first bike.
Got the primary cover cut out from a piece of carbon, washers made for the mounting screws & the left-hand footrest made today.
Just got the gear lever to sort out now & cut the cover spacers, down once I know how long they need to be to clear the primary belt & lie level with the clutch cover.
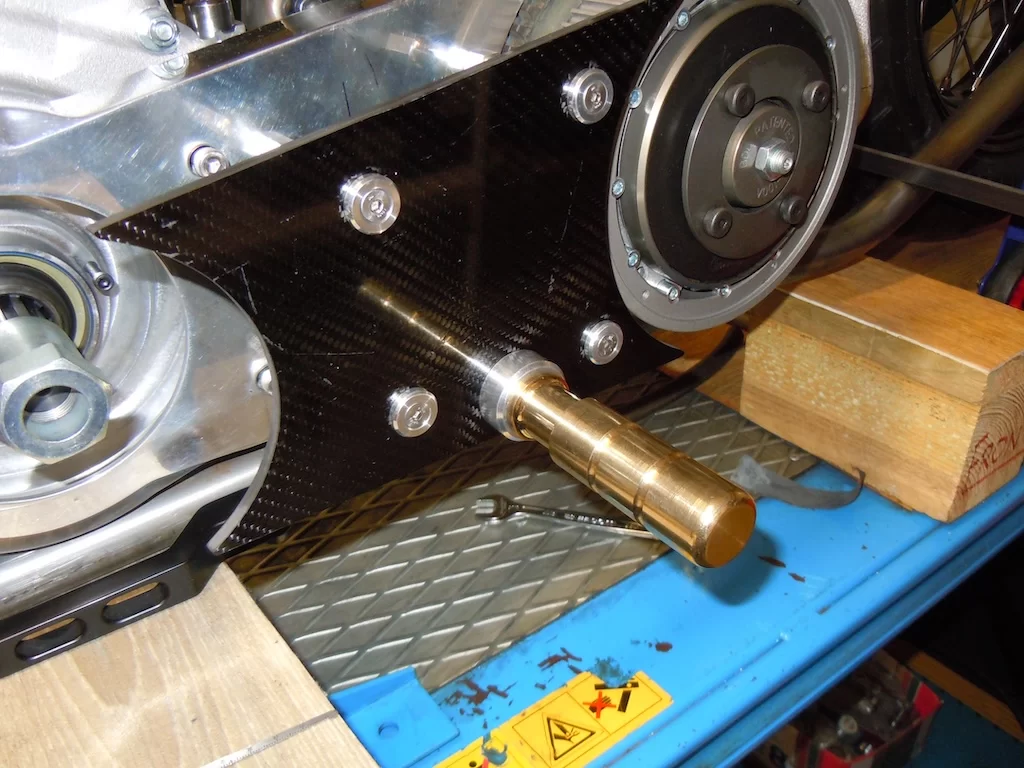
Just got the gear lever to sort out now & cut the cover spacers, down once I know how long they need to be to clear the primary belt & lie level with the clutch cover.
I realised that I'd wasted my time in post 259 above the other day when I got the engine mounted in the frame. It appears the lower top tube is a bit lower in this frame than the first frame & the top engine mounting point is therefore lower. This meant that my idea of copying the top engine mount that I'd made for the first bike wouldn't work !! 
Basically I would not have been able to get the frame mounting bolt in once the mount had been welded up !!
So, this is second version, with the tube reversed, now works. That did mean making another curved tube & cutting off the P-clip mount, but hey-ho, we live & learn !
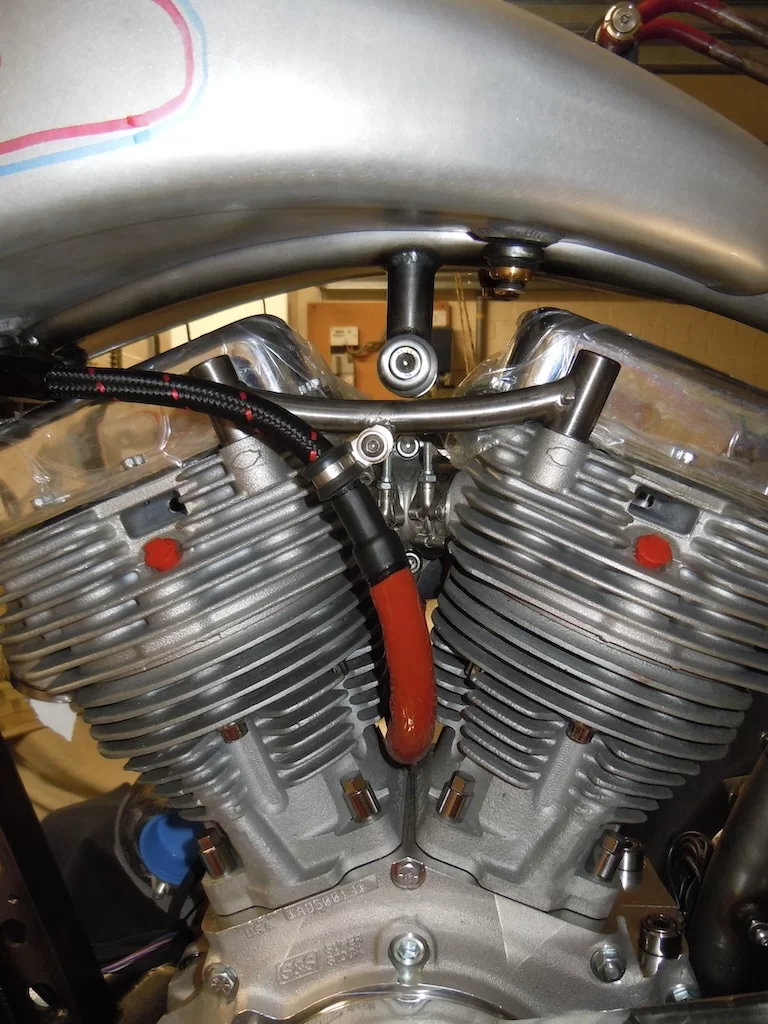
Also got the spacer made from brass for the fuel pipe P-clip.
Obviously I've still got to make & attach the two curved tubes that will connect this part to the frame boss, but that can't be done until the engine/gearbox/primary drive/rear sprocket are all aligned & secured in position. The fire hose on the fuel pipe is just for peace of mind !!
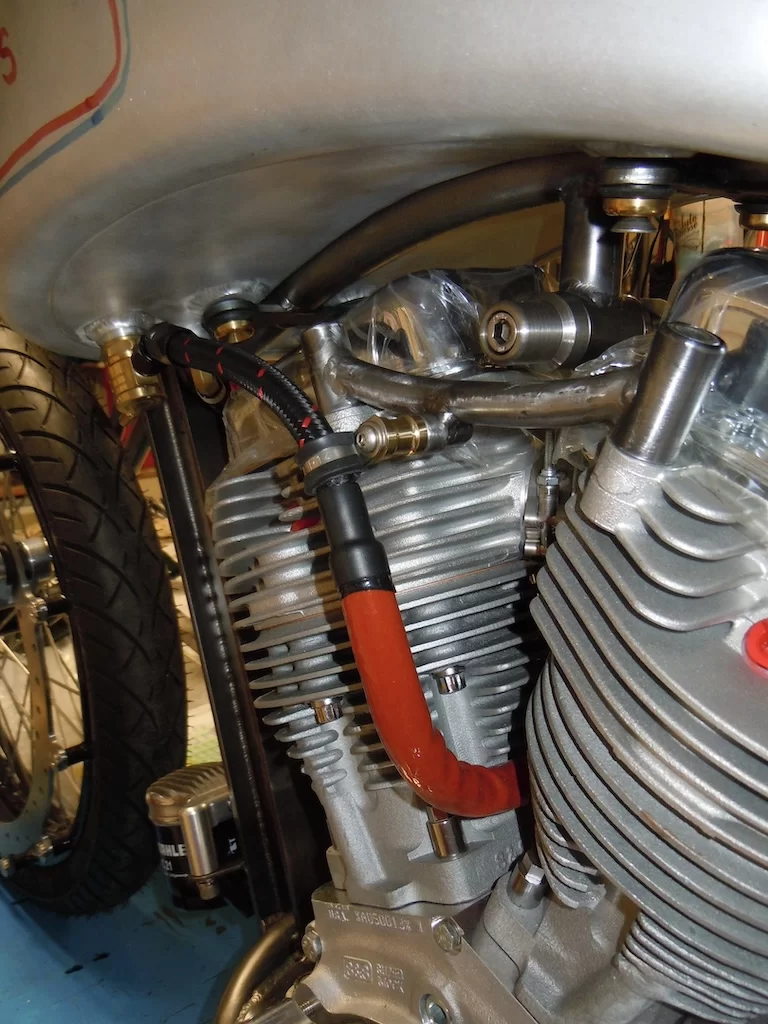
This is "old nail" number two as it stands at the moment.
Basically I would not have been able to get the frame mounting bolt in once the mount had been welded up !!
So, this is second version, with the tube reversed, now works. That did mean making another curved tube & cutting off the P-clip mount, but hey-ho, we live & learn !
Also got the spacer made from brass for the fuel pipe P-clip.
Obviously I've still got to make & attach the two curved tubes that will connect this part to the frame boss, but that can't be done until the engine/gearbox/primary drive/rear sprocket are all aligned & secured in position. The fire hose on the fuel pipe is just for peace of mind !!
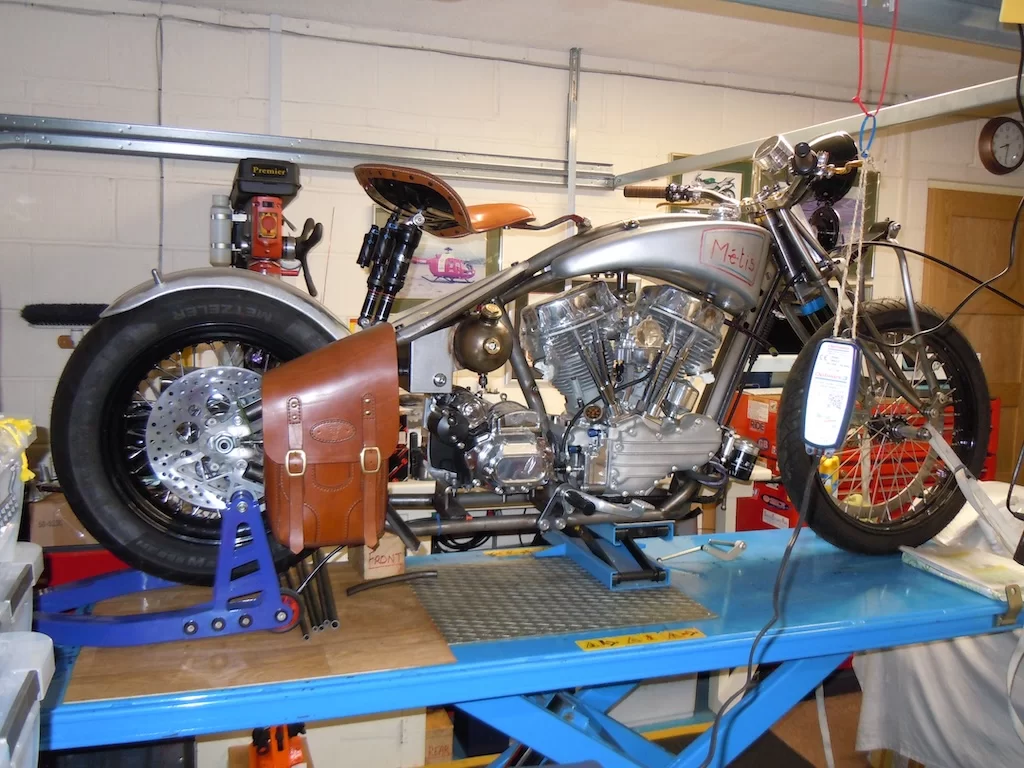
This is "old nail" number two as it stands at the moment.
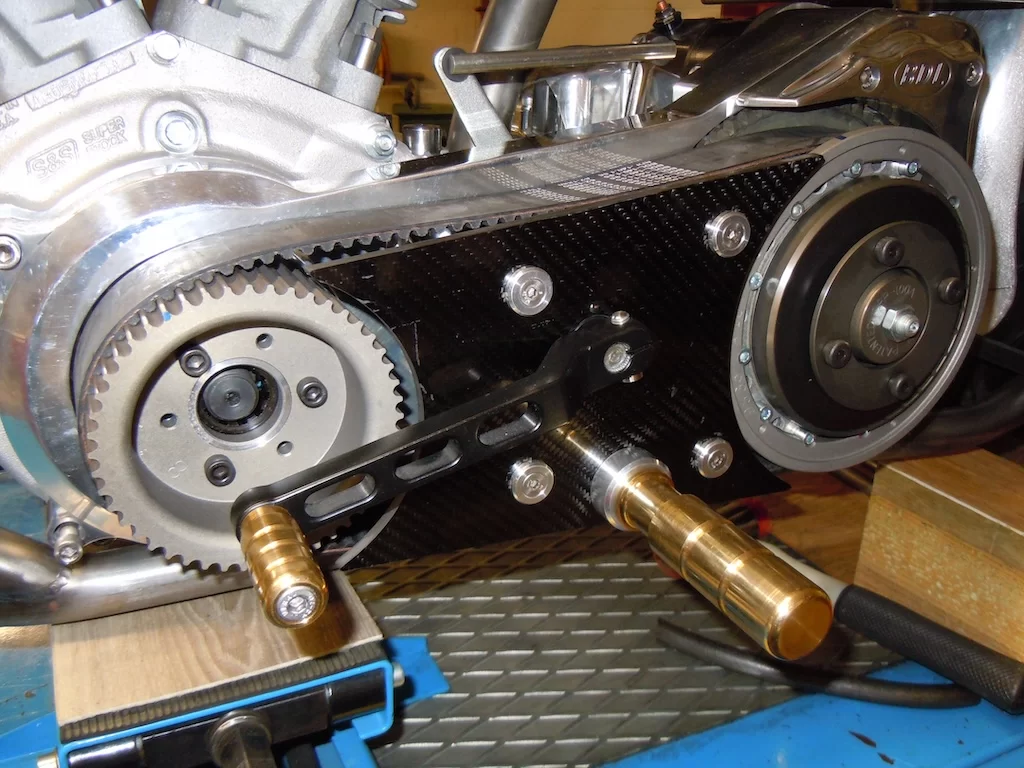
Got a working gear lever now. I still need to do some machining to install needle roller bearings for the gear lever shaft to rotate in, but this will do for the time being.
Initially I'll be running the bike un-painted to make sure no major modifications, requiring welding or similar major work, are needed. I'll be using plastic spacers in the place of the needle roller bearings too as they will be easy to take out when the motor-plate & other parts go for anodising.
Initially I'll be running the bike un-painted to make sure no major modifications, requiring welding or similar major work, are needed. I'll be using plastic spacers in the place of the needle roller bearings too as they will be easy to take out when the motor-plate & other parts go for anodising.
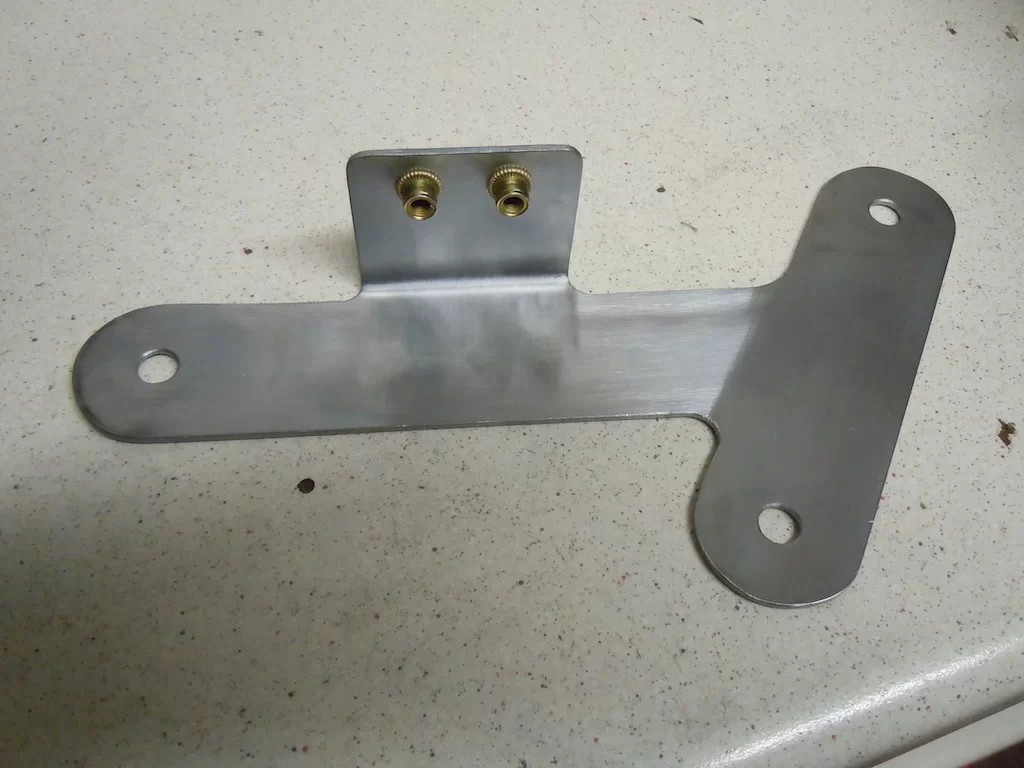
I got the oil catch tank mounting bracket finished today & fitted. Although this bike didn't really need it, providing I'd routed the hose/filter so it was higher than the crankcase outlet, because I had the parts anyway I just copied the bracket from the first bike & it sits behind the leather saddlebag so is mostly out of sight.
On the first bike I had positioned the crankcase breather filter under the gearbox & it kept chucking oil out, when I was riding it & when it was parked in the garage. I'd fitted the catch tank on that bike to see exactly how much oil was coming out, which turned out to be not very much at all, but then I could be bothered removing it & I didn't want a filter higher up on the frame somewhere.
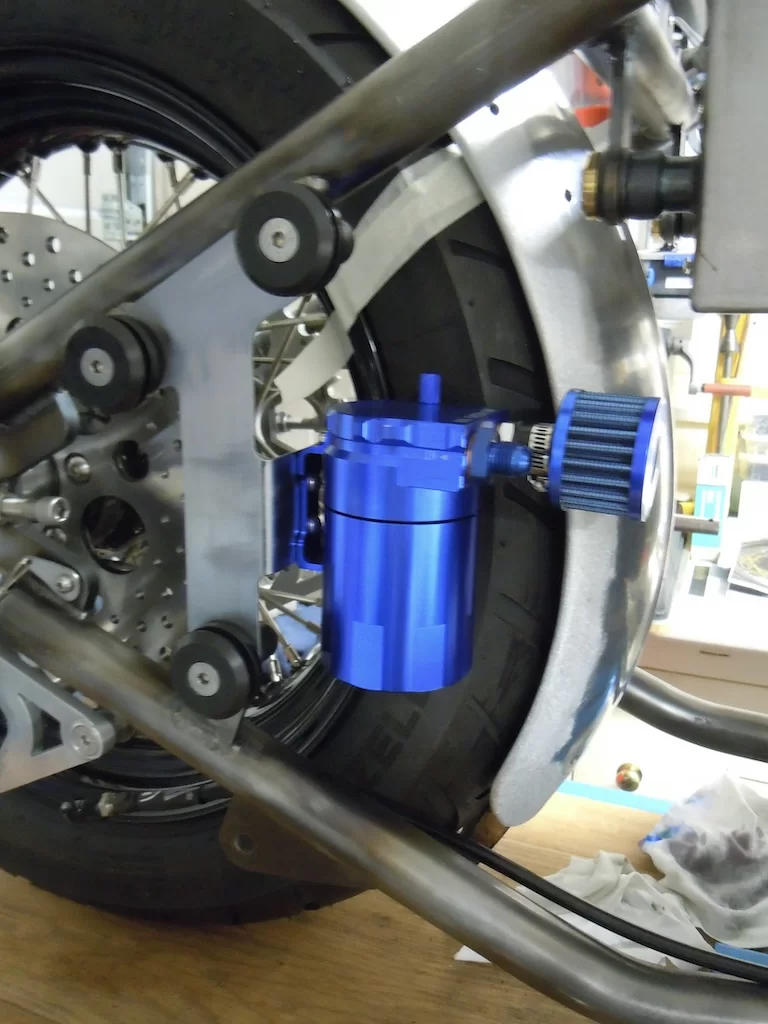
On the first bike I had positioned the crankcase breather filter under the gearbox & it kept chucking oil out, when I was riding it & when it was parked in the garage. I'd fitted the catch tank on that bike to see exactly how much oil was coming out, which turned out to be not very much at all, but then I could be bothered removing it & I didn't want a filter higher up on the frame somewhere.
Marked the position of the steering damper bracket & then removed the forks the other day for a bit more progress.
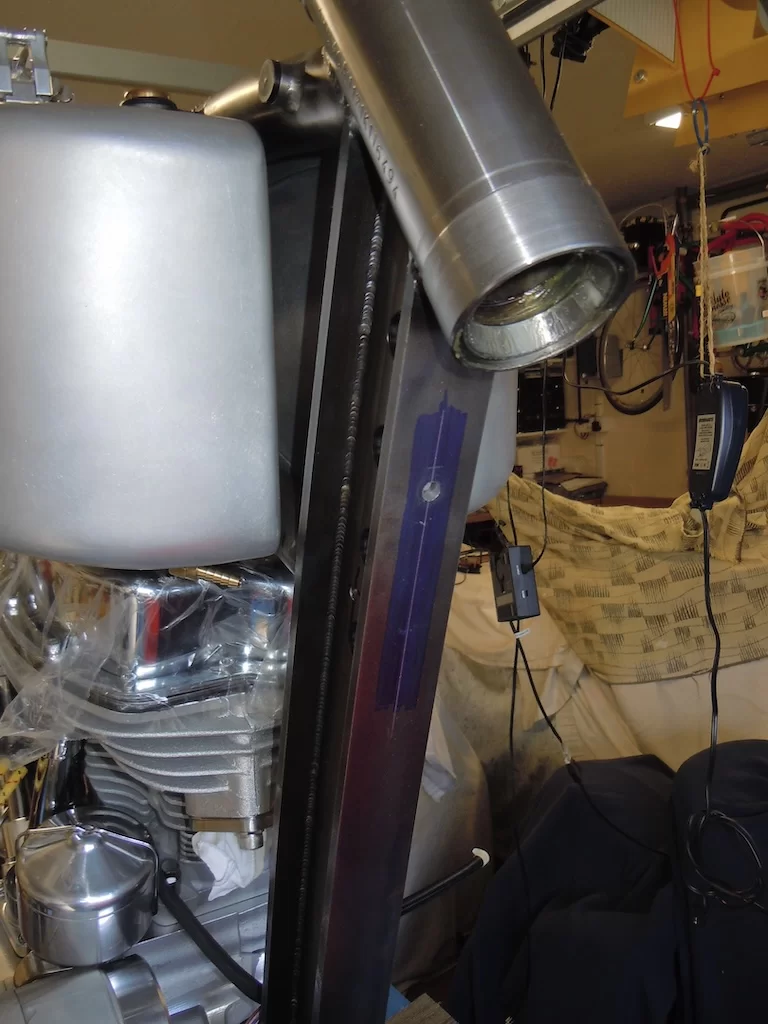
With the two holes drilled for the threaded inserts I tacked them in place. I'll finish the mating face as the welds will required grinding flat & will also be hidden by the bracket once that's fitted, but as my welding is not yet good enough, visually, I'll get my mate to do the welds that will be on view !!
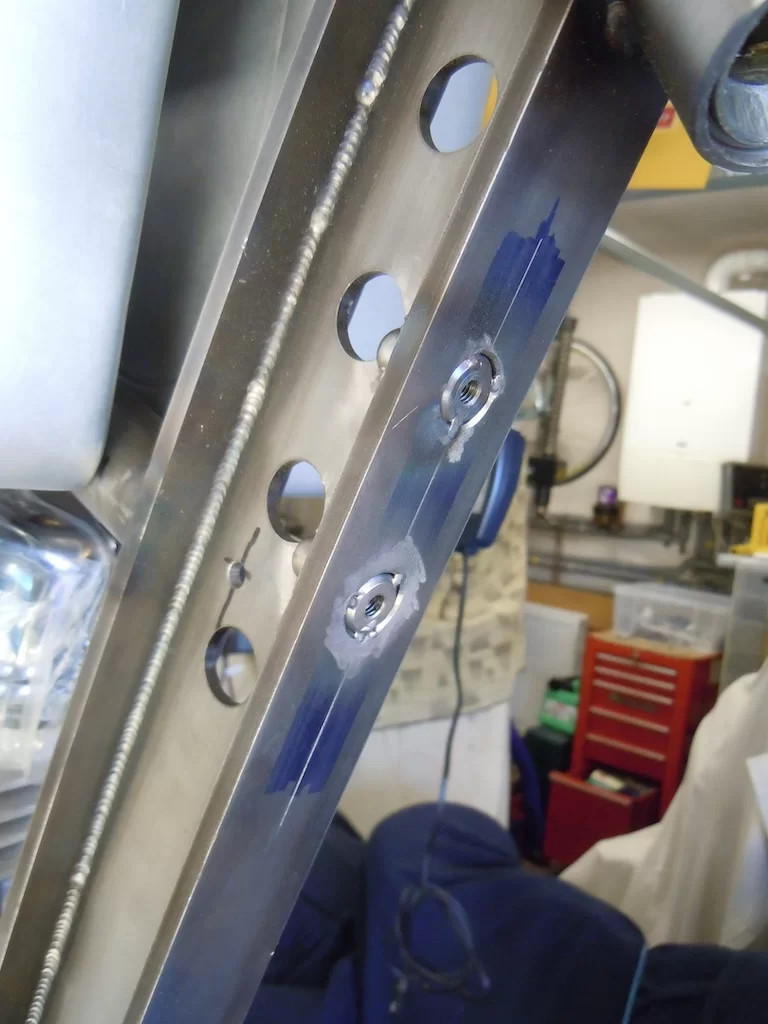
The white arm on the steering damper is just a 3D print as the one the damper came with was not long enough, but it was the longest one GPR do. Now I know the final length I'll get a final version machined.
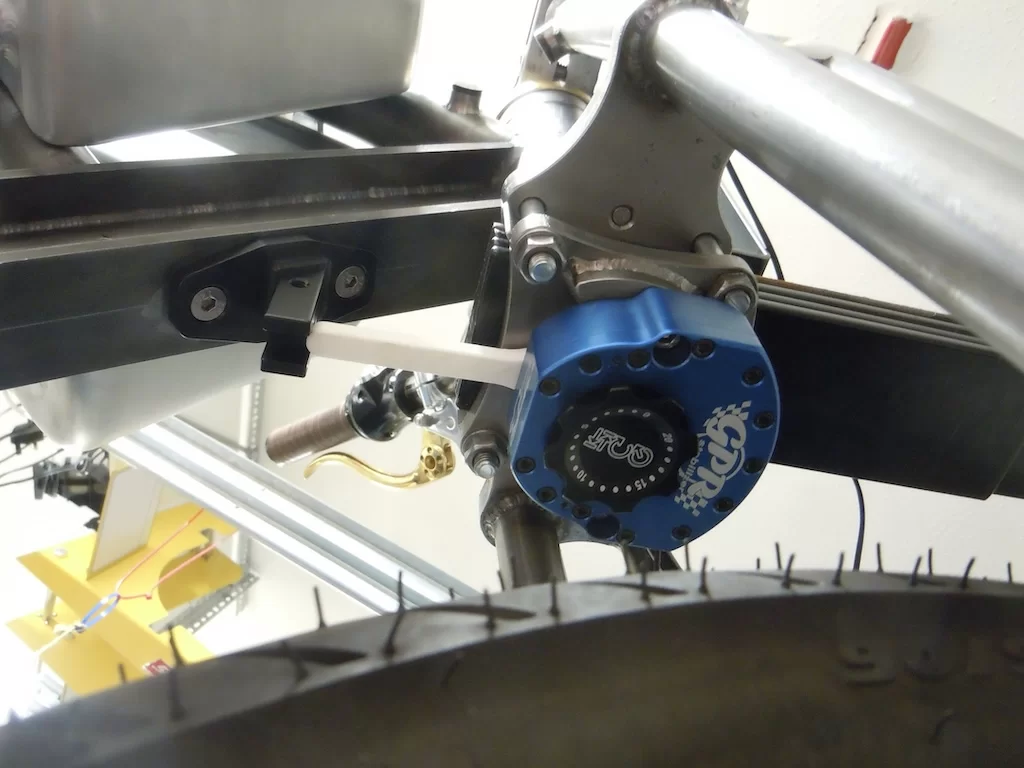
Also, while the forks were out I drilled the hole in the headstock for the wiring loom to pass through. I'll get a cover 3D printed to keep any rain out in case I get caught out in the rain.

With the two holes drilled for the threaded inserts I tacked them in place. I'll finish the mating face as the welds will required grinding flat & will also be hidden by the bracket once that's fitted, but as my welding is not yet good enough, visually, I'll get my mate to do the welds that will be on view !!
The white arm on the steering damper is just a 3D print as the one the damper came with was not long enough, but it was the longest one GPR do. Now I know the final length I'll get a final version machined.
Also, while the forks were out I drilled the hole in the headstock for the wiring loom to pass through. I'll get a cover 3D printed to keep any rain out in case I get caught out in the rain.
Are you not finished yet?? How many years are you faffing with this kwacker???..... Oh sorry wrong bike build treadMarked the position of the steering damper bracket & then removed the forks the other day for a bit more progress.
View attachment 97282
With the two holes drilled for the threaded inserts I tacked them in place. I'll finish the mating face as the welds will required grinding flat & will also be hidden by the bracket once that's fitted, but as my welding is not yet good enough, visually, I'll get my mate to do the welds that will be on view !!
View attachment 97283
The white arm on the steering damper is just a 3D print as the one the damper came with was not long enough, but it was the longest one GPR do. Now I know the final length I'll get a final version machined.
View attachment 97284
Also, while the forks were out I drilled the hole in the headstock for the wiring loom to pass through. I'll get a cover 3D printed to keep any rain out in case I get caught out in the rain.
View attachment 97285
Not at many as someone we both know !!Are you not finished yet?? How many years are you faffing with this kwacker???..... Oh sorry wrong bike build tread
(unless you're not talking about my Kawasaki project !! )
AgreeAre you not finished yet??
and he still needs to strip off the anodised tatt finish on lots of it too 
Yes he is, is that not finished yet eitherNot at many as someone we both know !!

No, it's not finished, but compared to your epics I've got loads of time left !!Yes he is, is that not finished yet either