Project Superspurt

I had filed that particular dilemma away in a wee box in my subconcious - now I'll not be sleeping for days :p

Overpressurisation of the FCR's even by the lowly SS pump is well documented, but if I do keep the pump then I have a cunning plan to make the return path a lot more attractive to the petrol than the feed path.

However

I can't really see what the problem would be with gravity? It has a few attractions, firstly the FCR trouble but also the saved weight of the pump (a lot of £££ in carbon or Ti to make the equivalent weight loss) and also less electrical stuff. Heck, the extra volume from removing the pump might compensate the fuel thats left in the tank when the level drops to the point when gravity runs out.

The only niggle is that if anyone else is successfully running gravity feed with FCR's then they are keeping quiet about it. I'll be in aboot the tank in the next couple weeks so will need to decide. Might toss a coin. Best of three.


You need to hurry up and sort it...........incase I suddenly find the spare £600 for a my pair :flash:
 
Question is, if I went for a "winter project" like this, what should I go for?

Quite fancy a 'non-rocketship' track/dry day only toy that I can build up over a long timeframe, but something relatively modern - a bigger monster, or 748 maybe. Maybe throw in a bit of performance bling.

Non-rocketship? I don't want anything too much like my old race bike; in case I get any ideas about racing again! Just something fun like the Diavel, but with some extra ground clearance and more natural track position.

*Edit* I do quite fancy a 1000 Sport...black, with white stripe, twin termi's, sports rubber. But probably too new and too expensive!
 
I'll have a wee look, I was thinking I would need to howk off a bit of the internal pipework to the tap (tap - there's something else needs a better solution), but maybe it can be done so that the job is reversible?

Immediate priority is to check the crank run-out then get the bottom end prepped for paint. Until that's painted I can't start building the bike back up.
 
Just a thought

I was thinking about you guys and gravity feed or not. I realise that the problem arises with the bottom of the tank being about the same height as the carbs so gravity feed might present a problem as the level drops.
So I thought about this: What you need is an internal container in the tank around the outlet for the fuel tap. Use the pump as a lift pump to keep this container brim full and overflowing. This will provide a gravity feed with a constant head equal to the height of the internal container above the carbs. I don't think this would be hard to do but it would probably mean cutting the bottom out of the tank to fit and then welding it up again.
Here is sketch of what I'm thinking of, excuse the poor drawing :o
 
I was thinking about you guys and gravity feed or not. I realise that the problem arises with the bottom of the tank being about the same height as the carbs so gravity feed might present a problem as the level drops.
So I thought about this: What you need is an internal container in the tank around the outlet for the fuel tap. Use the pump as a lift pump to keep this container brim full and overflowing. This will provide a gravity feed with a constant head equal to the height of the internal container above the carbs. I don't think this would be hard to do but it would probably mean cutting the bottom out of the tank to fit and then welding it up again.
Here is sketch of what I'm thinking of, excuse the poor drawing :o

Genius Derek!!
 
I had filed that particular dilemma away in a wee box in my subconcious - now I'll not be sleeping for days :p

Overpressurisation of the FCR's even by the lowly SS pump is well documented, but if I do keep the pump then I have a cunning plan to make the return path a lot more attractive to the petrol than the feed path.

However

I can't really see what the problem would be with gravity? It has a few attractions, firstly the FCR trouble but also the saved weight of the pump (a lot of £££ in carbon or Ti to make the equivalent weight loss) and also less electrical stuff. Heck, the extra volume from removing the pump might compensate the fuel thats left in the tank when the level drops to the point when gravity runs out.

The only niggle is that if anyone else is successfully running gravity feed with FCR's then they are keeping quiet about it. I'll be in aboot the tank in the next couple weeks so will need to decide. Might toss a coin. Best of three.

If you are running split FCRs they will be closer to the head and so lower. This might mean you can run straight gravity feed and not need to bother about pumps and stuff. Just a thought.
 
If you are running split FCRs they will be closer to the head and so lower. This might mean you can run straight gravity feed and not need to bother about pumps and stuff. Just a thought.

It's a banked pair. Came to the conclusion that the grief of setting up / living with splits would outweigh any advantage at WOT :)
 
This thread now over 10,000 views - surely a prize is on its way to you for such entertaining and engrossing posts
 
All the way back to post No.1 - My apologies Mr CJK - congrats to all involved in their projects for contributing here - still engaging and entertaining and now on its way to 11,000 views i'm sure.
 
  • Like
Reactions: CJK
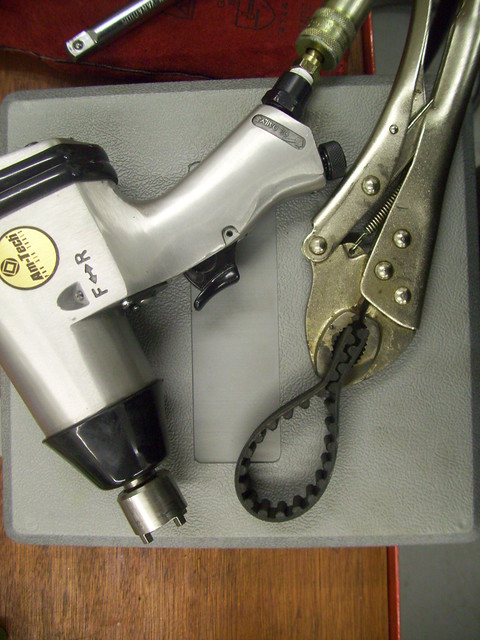
Cam pulley removal - obvious really...

The wee socket with the 4 spigots to fit the 'special nut' is readily available from a number of sources. Not so the tool to hold the pulley, and it's £45 from Ducati, although that is looking like not bad value right now.

Over 3 hours or so tonight I have made two versions of two tools involving amongst other things turning and boring a donor pulley, welding, grinding, swearing, minor burns and got no further forward :mad:

Had a wee sit on the MZ of wisdom and stroked my chin a bit. Here's all that was needed. Job done in about 8 seconds. Obvious really..


Cam Pulley Removal by PICT, Angus, on Flickr

Should work fine for torquing up too, but if not, I'll be buying the tool off Harry and not @@@@ing about again wasting 3 hours to save money.

(Can't believe '@@@@ing' gets bleeped! At least the spell checker doesn't substitute 'torquing' with 'torturing' like it does at work... been lucky so far that my tenders for torturing equipment haven't made the papers :eek:)
 
Last edited:
Heads and Cylinders off

There is slight corrosion on the horizontal studs - I'm all for leaving them as they are. Don't fancy the world of pain that will be galled threads, snapped studs, need to split cases to repair etc etc if I attempt to get them out.

Reassure me they'll be fine :scratchhead:

Bit of a CSI sketch... horizontal looks like it has never been off, very sooty piston and head, very rough honing. Vertical looks like it has been newly fitted - new studs, base gasket, clean piston (with a couple wee marks on the crown but not from valves), moderately sooty head, fine honing with odd wear marks. All very interesting.
 
There is slight corrosion on the horizontal studs - I'm all for leaving them as they are. Don't fancy the world of pain that will be galled threads, snapped studs, need to split cases to repair etc etc if I attempt to get them out.

Reassure me they'll be fine :scratchhead:

Bit of a CSI sketch... horizontal looks like it has never been off, very sooty piston and head, very rough honing. Vertical looks like it has been newly fitted - new studs, base gasket, clean piston (with a couple wee marks on the crown but not from valves), moderately sooty head, fine honing with odd wear marks. All very interesting.


I'm lost,is this now the motor that was in the bike,the motor I put in ?
If so,then I had the vertical barrel and head off to replace the rings,never touched the horizontal.
 
There is slight corrosion on the horizontal studs - I'm all for leaving them as they are. Don't fancy the world of pain that will be galled threads, snapped studs, need to split cases to repair etc etc if I attempt to get them out.

Reassure me they'll be fine :scratchhead:
FYI - The old style studs that were prone to breaking had a bright shiny steel finish. The later studs are black.
 
I'm lost,is this now the motor that was in the bike,the motor I put in ?
If so,then I had the vertical barrel and head off to replace the rings,never touched the horizontal.

Yep - that motor :p I had it in my mind that you hadn't been in about that one! Maybe I should read this thread again :o Well - you made a lovely job of it, nice graphite grease on the studs, copperslip on the threads, and I hadn't picked up on it til you mentioned but the vertical rings are twice as springy as the horizontal. All of no consequence right now as these won't be used on this project :rolleyes:

Certainly looks like the horizontal has never been off and really interesting (ha- to me anyway) to see the differeces in the bore finish between the two.
 
Last edited:
FYI - The old style studs that were prone to breaking had a bright shiny steel finish. The later studs are black.

Cheers Derek - vertical are black and look like new, horizontal are also the black ones but have some surface corrosion; think I'll give then a dicht with emery and a lick of paint but otherwise leave them be.

Casings are marked '93' but I suppose engine could have been assembled as late as 95 or so?
 
big red guy

The big red guy is looking so good,
how did you do the pipes.
trade secret.
maybe the same guy as me
anyway, bike looks nearly as clean as ma yellow boy:)
 
The big red guy is looking so good,
how did you do the pipes.
trade secret.
maybe the same guy as me
anyway, bike looks nearly as clean as ma yellow boy:)

Hi Johnny - you have lost me bit this time! Anyhoo.. off to the garage for a bit of messing about :)
 
Scunner

Am stripping the crankcases of paint and anything else that will impair the new paint job - what a chore!

Crankcases are complete less cylinders/pistons/heads while the stripping is being done. Clutch and alternator covers will come off prior to painting.

Cylinder, oil filter holes are filled with rags and masked but it's still an effort to keep the paraffin / paint stripper / brake cleaner / cellulose thinners from getting where it shouldn't.

Wondering if it might have been easier to split the cases but surely not - would have ended up changing every bearing, bush and seal along the way, balancing crank etc

Even with the cases split, all these wee recesses that you can't get a rotary tool or wire brush to would still need dealt with but at least they then could have been blasted.

This all better be worth it :o
 
Last edited:
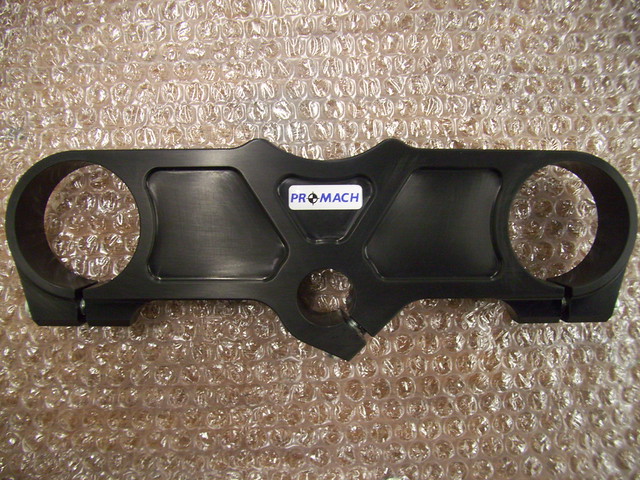
Not been at the project for a couple of weeks. A long awaited parcel arrived yesterday so thought I'd better get on with it.


Tope Yoke 53mm by PICT, Angus, on Flickr


As seems to be the norm with these one man specialist outfits, the work is excellent, the price very reasonable, but took forever (can't even remember - 6 months?) to arrive!

Anyway, back to the crankcases... as anticipated in the previous post, it went like this;

Paint stripper
Lolly sticks
Toothbrushes
Pan scourers
Wire brush
Scourer with white spirit
Rag with white spirit
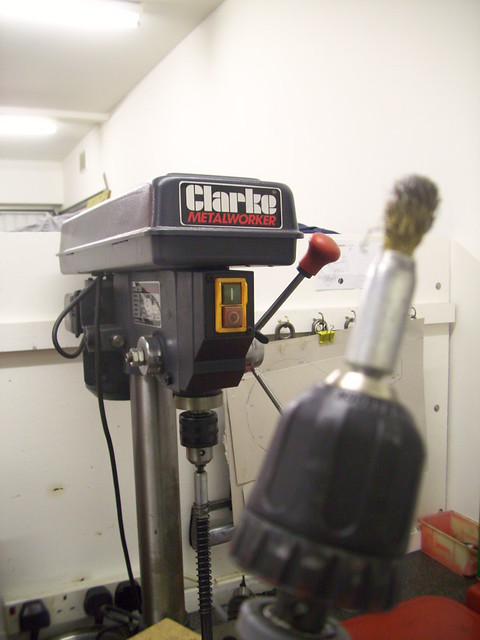
Wire brush on flexi drive
Pointy scrapy thing / air line
Brake cleaner


Flexi Drive by PICT, Angus, on Flickr


Couldn't get a very representative photo, but the crankcases really are super clean to the bare metal;


Paint Stripping by PICT, Angus, on Flickr


Having the OCD as I do I have also taken a file to some of the casting witness marks. There are still some wee balled up bits of dried paint stripper to sort out from nooks and crannies but I've had enough for tonight.. it doesn't take long to get wearied with this.

Next after finishing that will be to take off the alternator cover so that I can get the starter off and get the remainder of the paint off the cases, clutch casing off, mask everything, get a bit of heat in the garage (had my tammy on tonight!) and give it a few coats of etch primer. Sounds like about an hours work eh? Ha!
 
Back
Top Bottom