1994 Monster M600

yellow and black

yeah Bruce,
i'm glad i kept the yellow 998s,,
seems, maybe people are liking the yellow and black noo, mmm? :)
 
Haven't touched it since last post. Nae power or light in the shed so limits working time.[/QUOTE] Get yer sel a long electrical extension and a wee gas bottle wood burner stove for heating you'll have it done in no time.
 
yellow and black , again.

and back again,
yellow and black guy selt, don't know how much , but the guy got back to me to say the bike
had recently been serviced but needed an o ring for the fuel pump
oh well, ho hum :)
 
maybe only snoozed for two minutes,
i contacted the guy with a question and just after someone must have offered him his price,
I'm sure, he'll get back to me..
cheers :)
 
I had an hour or so spare today so I've made some progress.

Got the exhaust off without any problems - dunno what I was so worried about. Everything unbolted cleanly - except the clamp that joins the front and rear sections but I just cut that off.

Cracked the head nuts too, no issues here either, although access is not the best.

What's left is currently suspended from the shed roof as the back wheel is off, was in the middle of removing the swingarm when I stopped.

I assume that the pivot can be simply driven out once the pinch bolts are suitably loosened but how do you get the rubber bungs out - mine seem to be stuck in, tried pulling 'em but I don't want to destory them in the process?
 
Last edited:
haha why no you've destroyed everything else , use your magic tool Graeme that big hammer thingy that i always see you banging everything wie :comp2:
 
Engine spacers

Hello did you notice what side the 5mm spacers between the engine and frame are on? There is one at the front and one at the rear my monster came as a box of bits but if I bolt it up on the wrong side the sprocket alignment will be out. Nothing in the Heinz book.
 
Hello did you notice what side the 5mm spacers between the engine and frame are on? There is one at the front and one at the rear my monster came as a box of bits but if I bolt it up on the wrong side the sprocket alignment will be out. Nothing in the Heinz book.
I sure did. Right hand (i.e. Cambelt) side.

engine_spacer.jpg
 
Last edited:
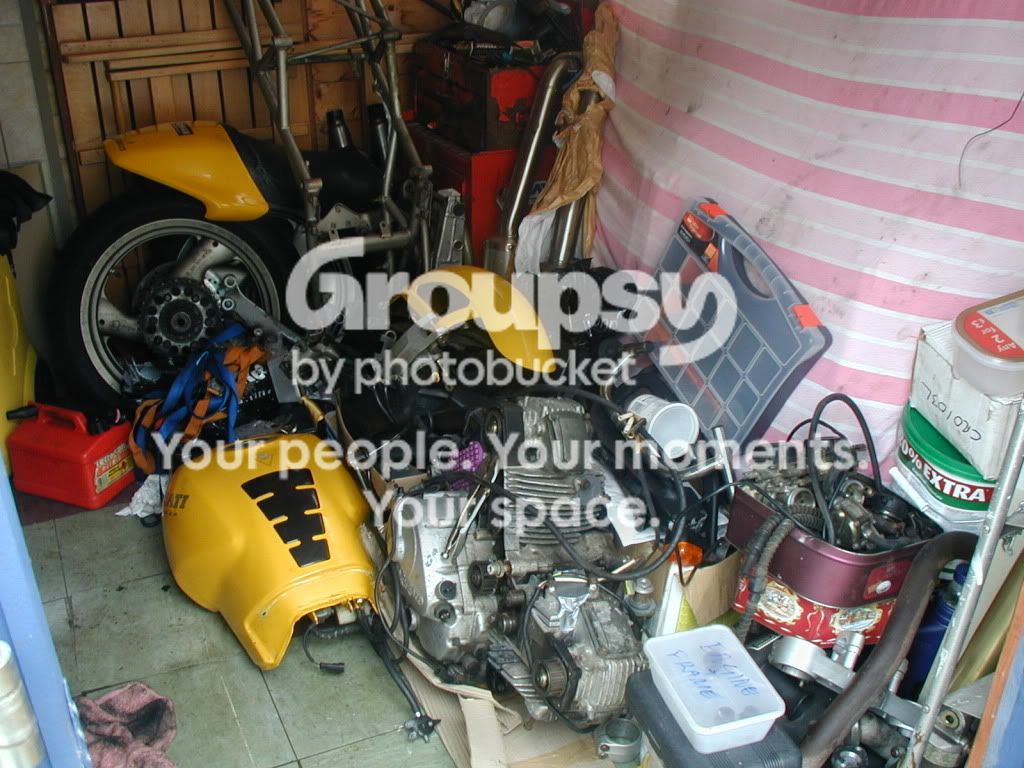
The Monster is now officially a pile of bits.

DSCF4830.jpg


Finished the main disassembly this morning. There are 1 or 2 sub-assemblies that need a bit more dismantling but basically it's ready to start the refinishing work. It's going to be an interesting winter
 
Great thank you! I looked at the SS which are on the opposite side when I went to attach the link from the swing arm to the pivot there was a misalignment with the rose joints which will now bring them into line by moving them to the other side.
 
Apart from the tank and seat swaping places in the pile - unfortunately not.

I suspect things will remain pretty much as is until the new year :(
 
Here's me thinking I had slowed up! I am hassling the painter at the moment to get things back so I can proceed further.
 
I need to get a move on I have a deadline for my TT2 build and get something done with the other two.
 
Over the last few days I've been further stripping the sub-assemblies, removing nuts and bolts, and readying stuff for blasting.

The frame, swinging arm and all the alloy parts were dropped off at the blasters this afternoon and should be ready for collection mid-January.

Once I get the wheels stripped and the tyres off they'll be dropped off too.

I'm really looking forward to getting them back as I know it'll give me more motivation.
 
Last edited:
Over the last few days I've been further stripping the sub-assemblies, removing nuts and bolts, and readying stuff for blasting.

The frame, swinging arm and all the alloy parts were dropped off at the blasters this afternoon and should be ready for collection mid-January.

Once I get the wheels stripped and the tyres off they'll be dropped off too.

I'm really looking forward to getting them back as I know it'll give me more motivation.

Will I stick the bits of bar I ground to remove the bearings in the jiffy bag when I return your brackets for you to use removing the wheel bearings?
 
Last edited:
I managed to spend somtime in the shed this afternoon and moved things around a bit so I have some more room to work.

Started stripping the wheels too. I got the discs off but my 5mm Allen Key will never be the same - feck, those bu66ers were tight.

Looking at my cush drive bushes, they're all knackered, which might make removing them more difficult but definately needing new 'uns.
 
I managed to spend somtime in the shed this afternoon and moved things around a bit so I have some more room to work.

Started stripping the wheels too. Looking at my cush drive bushes, they're all knackered, which might make removing them more difficult but definately needing new 'uns.

By moving things around do you mean I posted seat brackets to Sam?
Regards to the bushes if you use say a 6mm drill between the outer metal shell and inner sleve keep on chain boring the rubber you will then be able to remove the inner sleve. Then using something like a dremmel carefully cut the outer shell you will then be able to remove them. p.s. it will be time consuming tho!
 
Things didn't go as planned today. On the way to the P.O. I got called out for work so had to turn back home.

Trish went out on her own and posted the brackets for me..... so you should have them by mid-week :)
 
There ye go nice stainless brackets. if ye use photo shop ye can colour them in before ye print it will save on painting them. p.s. remember and print @ 100% or they will not fit! Sam;)
 
Back
Top Bottom